

Knowledgebase: Media
How to upload and display PDFs
Here are the steps to upload a PDF file and place a link to it on your Dirigible website:
- Access the backend of your website and navigate to “Pages” -> “Add New”.
- Create a new page by giving it a title, such as “PDF Sample”. Customize the page content as desired, such as adding a description or button.
- Publish the page to make it live on your website.
- Next, go to “Media” -> “Add New” to upload the PDF file. Click the “Select Files” button and choose the PDF file from your computer. Alternatively, you can drag and drop the PDF file into the media library.
- Once the PDF file is uploaded, you can obtain its URL by clicking on the “Copy URL” link in the media library. This URL can be used to access the PDF directly.
- Return to the page where you want to place the link to the PDF. Edit the page and locate the section where you want to insert the link.
- To create a link using a button, use the block editor or a page builder to insert a button element. Add the text for the button, such as “View PDF”. In the link settings for the button, enter the URL of the PDF file or choose it from the media library.
- Alternatively, to create a link using text, highlight the text that you want to turn into a link. Click the “Link” button in the editor toolbar, enter the URL of the PDF file or choose it from the media library, and save the changes.
- Update or publish the page to apply the changes.
- View the page on the front end of your website. You should now see the link or button that leads to the PDF file.
By following these steps, you can upload a PDF file to your Dirigible site and create a link or button that allows visitors to access and view the PDF.
If you have any further questions, feel free to ask.
My Circle Images Look Wrong
Circular images are often a popular choice for headshots and other photography on Dirigible sites. However, circular images are one of the instances where the image aspect ratio matters. Crop your image to have a 1:1 aspect ratio, and they’ll behave much more reasonably!
What is aspect ratio?
Aspect ratio refers to the proportional relationship between the height and width of an image, video, or any rectangular shape. It is expressed as a ratio, typically in the form of width:height.
In the case of an image with dimensions 200×200 pixels, the aspect ratio would be 1:1. This means that the width and height are equal, resulting in a square shape.
While we try and take care of most of this for you and this should work without uploading a square image, browsers can be wonky things. If you feed it what it wants directly, there’s much less room for error.
WordPress’s Media Library 101
Managing your site’s media
The Media Library is your best friend when it comes to storing and saving the files you put on your website. This is where you can find all of your uploaded photos, videos, documents, etc. that you have placed on your site. In the Media Library you can view, search, and make changes to your uploaded files. We want to help you get familiar with the Media Library and overall help with the look of your site when it comes to uploading media.
In this post we will cover:
- How to get to your Media Library
- How to upload new media to your library
- How to edit the metadata of your files
- Examples of blocks with media that you can utilize on your own site!
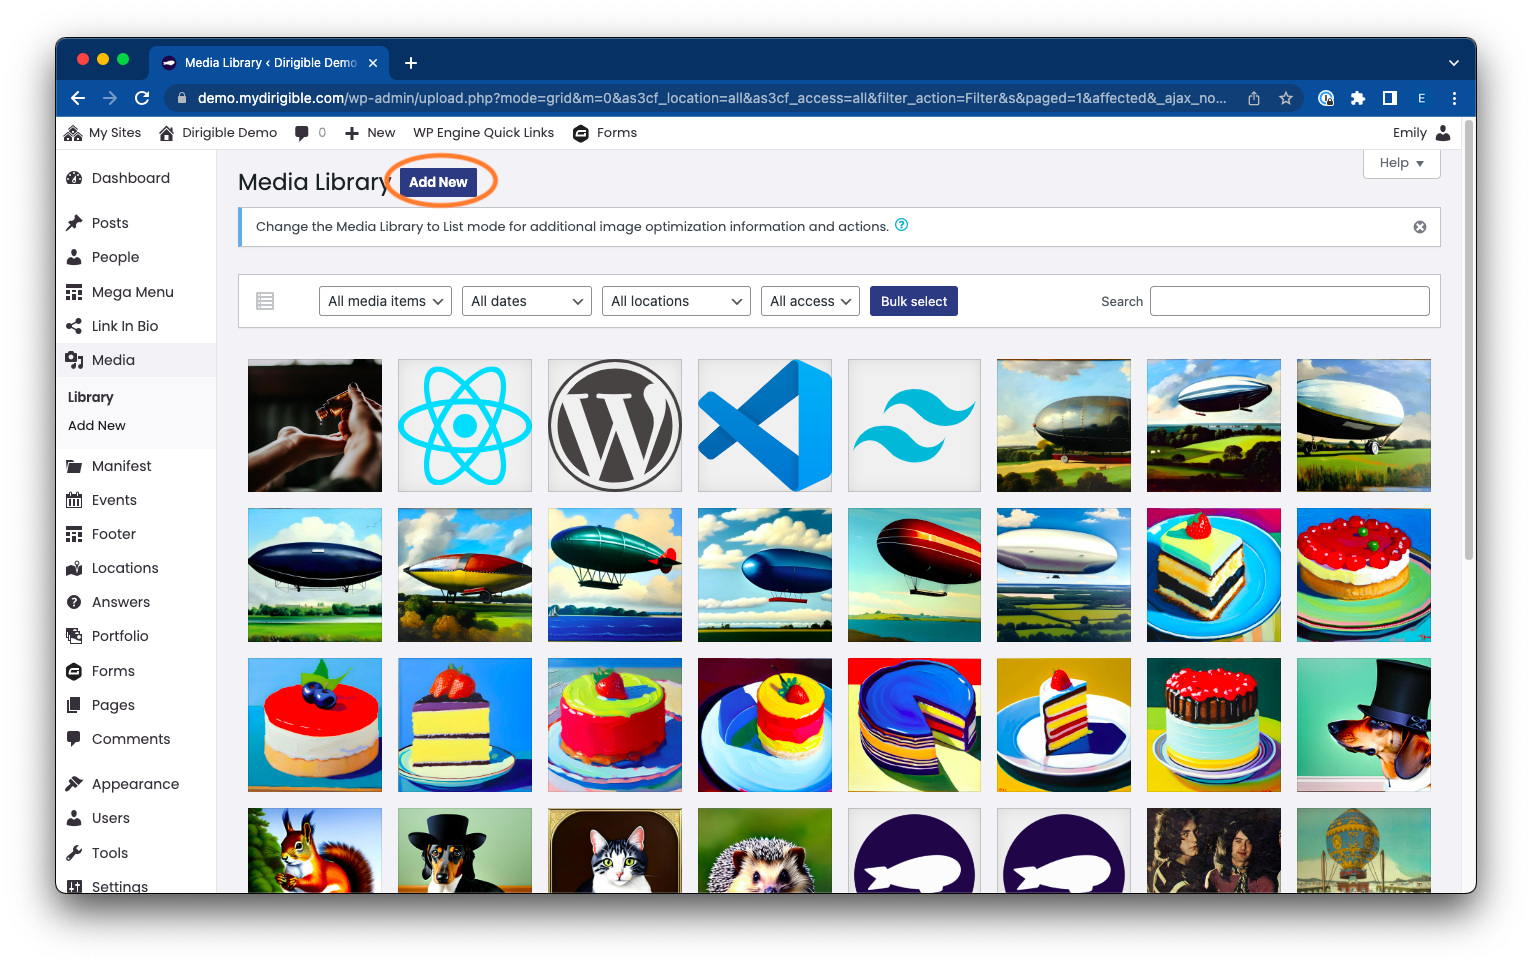
How to get to your Media Library:
- In your Dashboard, scroll down and click on Media > Library.


- When in your Media Library, there is a bar at the top to organize or filter your media.
- Your library items can be displayed in List Mode or in Grid Mode (the screenshot above is in Grid Mode).
- This next drop down menu allows you to filter for a specific type of media: All media items, Images, Audio, Video, Documents, Spreadsheets, Archives, Unattached, and Mine. This is helpful if you are looking for a specific format of media.
- The dates drop down menu helps you filter your library by timeframe. You might use this one if you are looking for a specific series of photos that you remember uploading this time last year.
- If you are looking to filter based on location of files, use this drop down menu.
- The last drop down menu lets you select between public versus private files.
- Clicking on Bulk select allows you to select multiple files in your Media Library. Very useful if you are needing to delete a lot of your media at once.
- Note: if you are in List Mode the Bulk select button instead says Filter, which you would click after making your drop down menu selections to search.
- Lastly, use the search bar if you remember the name of the file you are looking for.
How to upload new media to the library:
- Any piece of media or file that you upload onto a page or post on your WordPress site will automatically be saved and stored in the Media Library. You can keep uploading your files that way, but you can also upload directly into the Media Library if you click the Add New button at the top of the page.
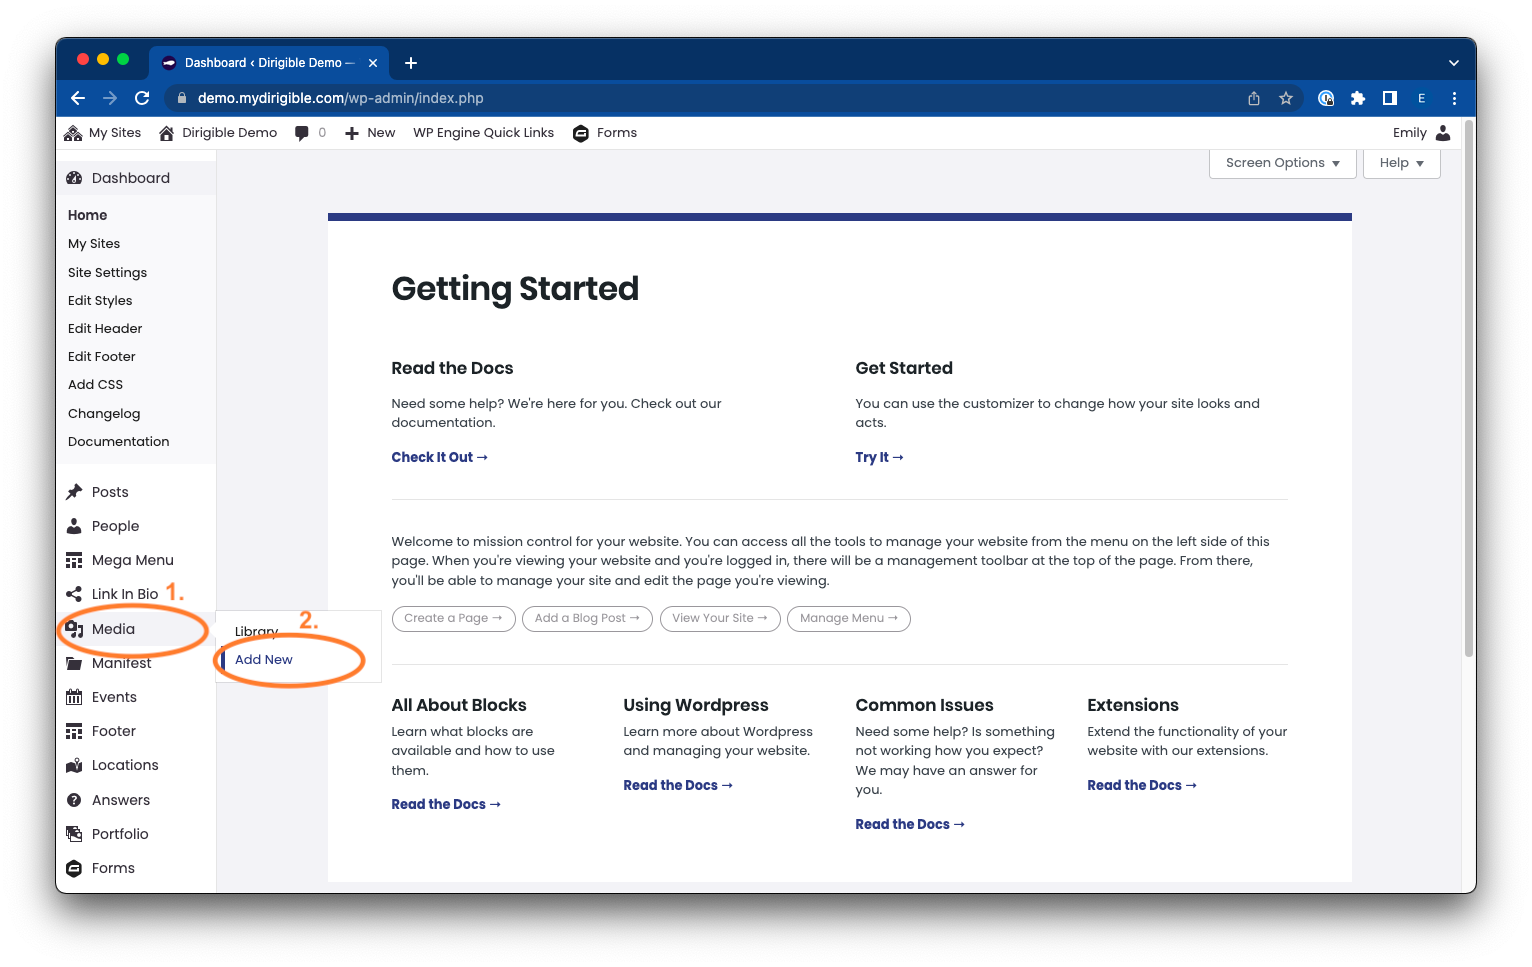
- You can additionally upload media directly from the dashboard by clicking Media > Add New
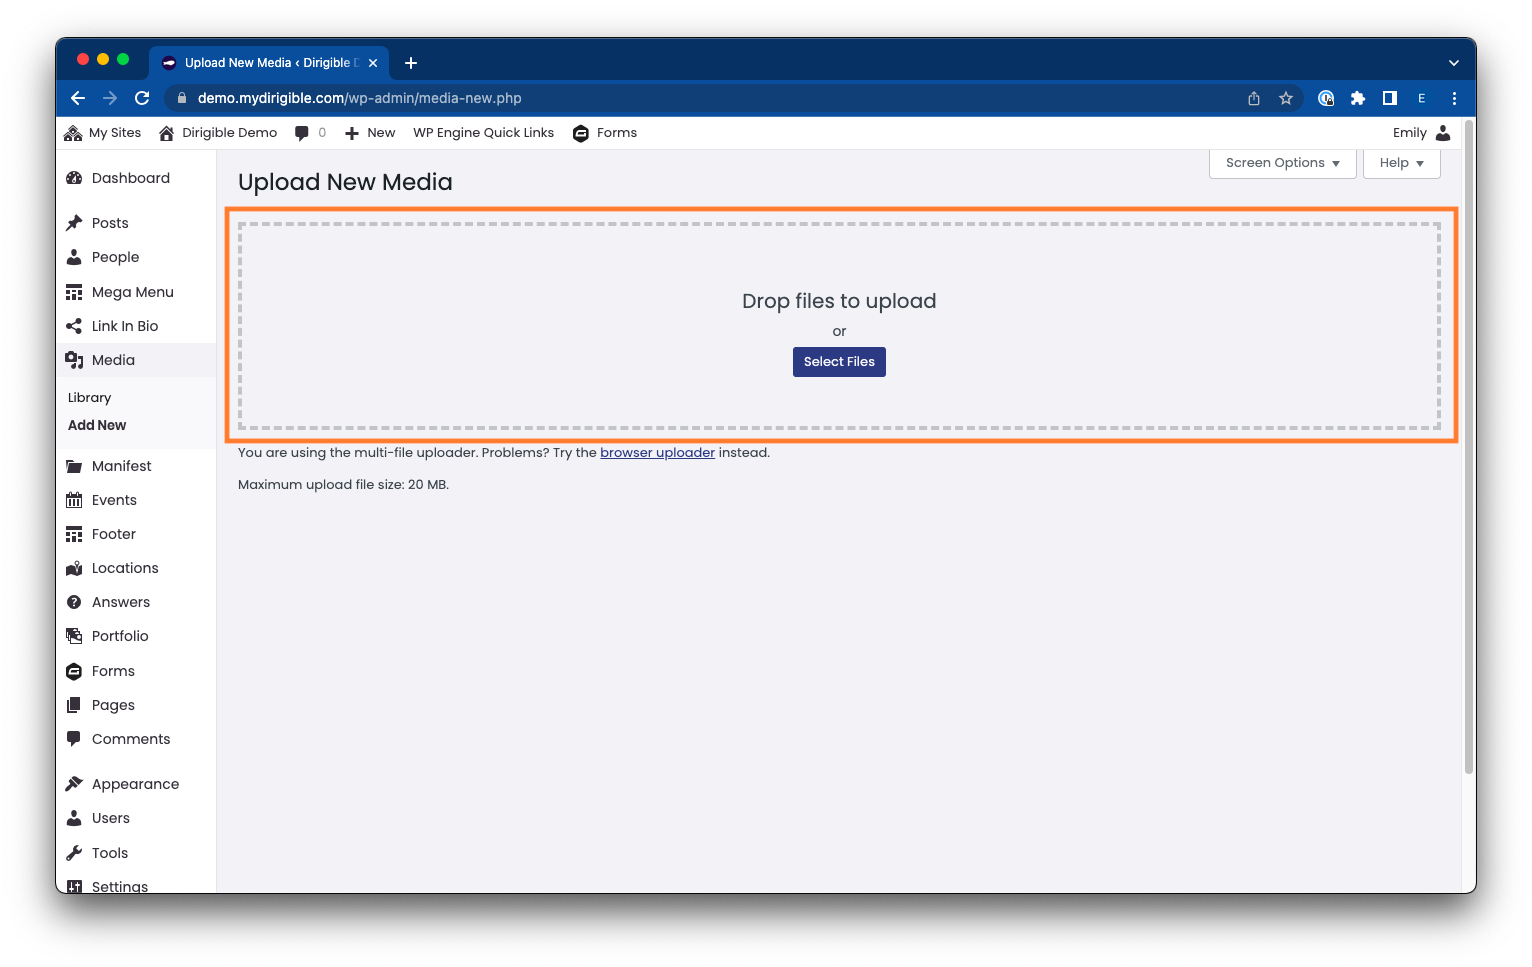
- Now you can drag and drop your files into the dashed box that pops up. You also have the option to browse your computer to upload a document if you click the Select Files button.
How to edit the metadata of your files:
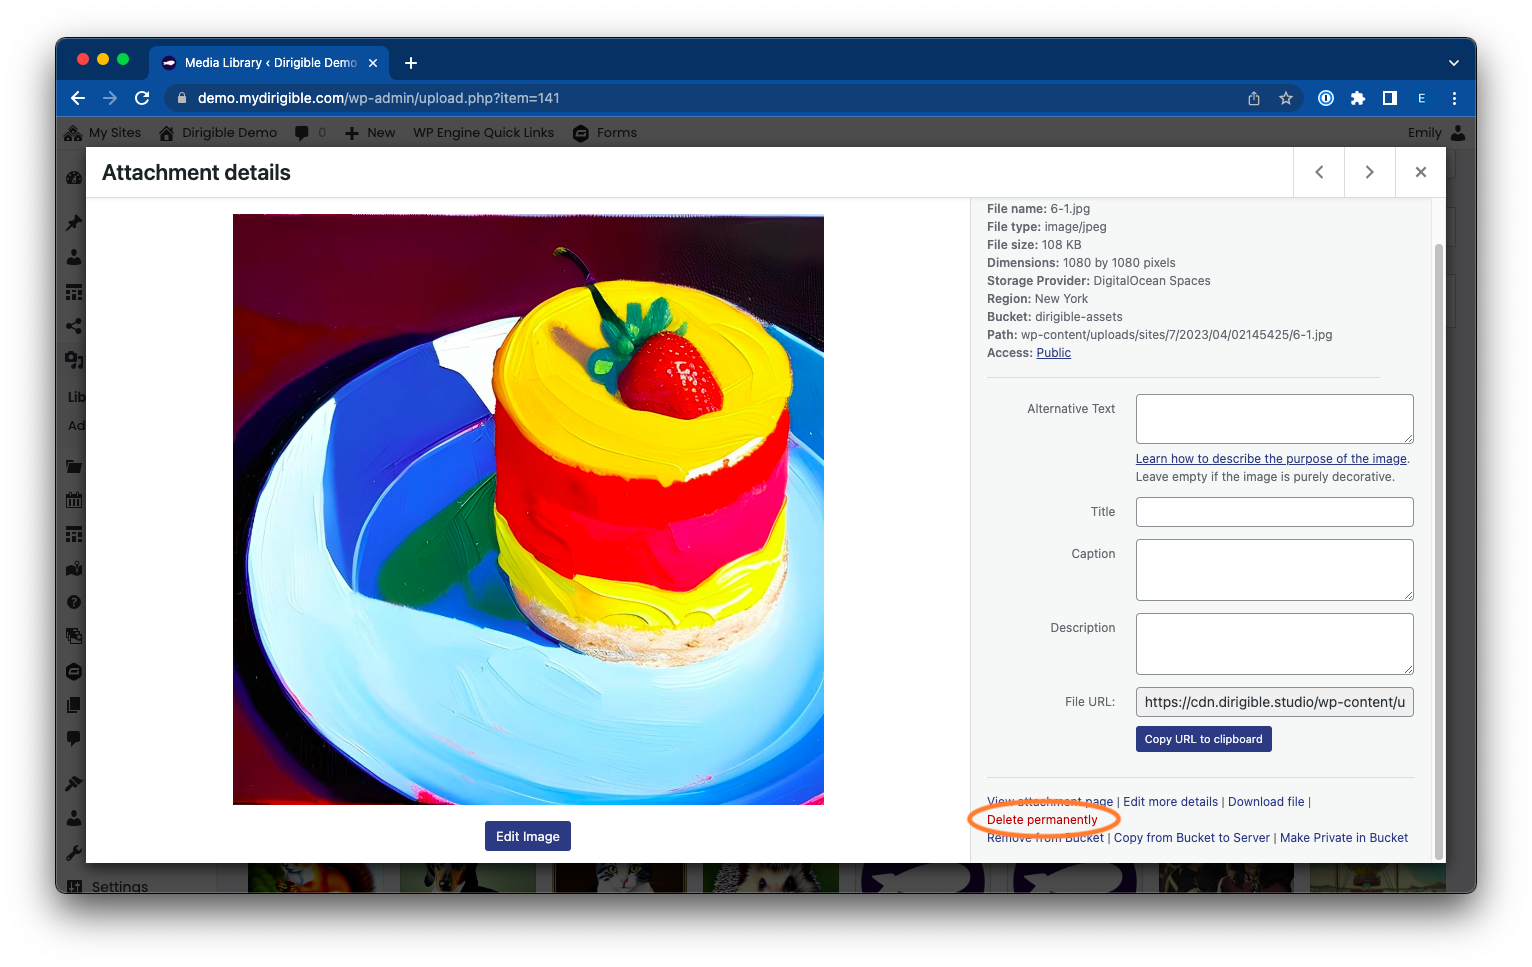
- In your Media Library, images, videos, documents, and audio files have textbox fields where you can add or edit the information when you click to open up the media: Title, Caption, Alt Text (only for images), and Description.
- After selecting your file and clicking to open it you can add or edit to any of these text boxes to add more information to your file.
- Note: You can also view a file’s URL here just under the Description textbox.
- Note: You are also able to delete files here if you scroll to the bottom of the media window and click Delete permanently. This is better than the bulk selection method if you are just looking to delete one file.
Examples of blocks with media:
Hero Block

Yearbook Block

Video Gallery Block

Vignette Block

Gallery Block
To see more examples or to get a more in-depth usage of blocks, visit our Blocks page here.