

Customizing Styles
- Home ›
- Using WordPress ›
- Site Editing ›
- Customizing Styles
Customizing Styles
The WordPress customizer is the control center of your Launchpad website, providing you a real-time view of your styles and site layout. You can access it by going to Appearance > Customize. When you first activated Launchpad you were presented with an onboarding sequence that helped you make some initial choices. You can change these choices in the Customizer. You can access the onboarder once again by clicking on Theme Setup.

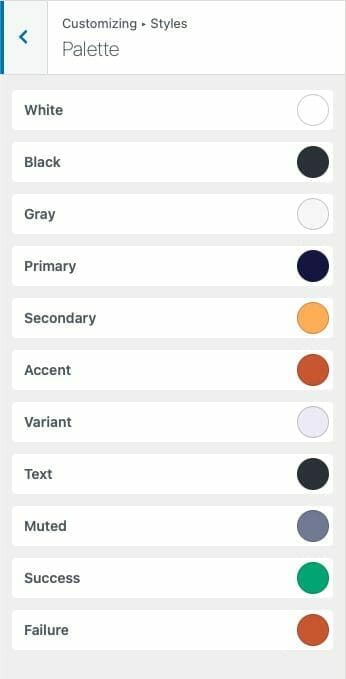
Changing brand colors & color palette
You can access the colors of your site by going to Appearance > Customize > Styles > Palette. These are global colors that are allowed throughout your site. These colors provide a cohesive design and color language throughout your whole sit
For information on adding and changing colors view How do I change my colors.
Installing & setting a font
How to choose good fonts
From Google Fonts
Visit https://fonts.google.com.
Select the font you would like to add to your Launchpad site.

Select the style you wish to add to your site. In this case we’re simply selecting the Regular weight. You may also have to include both the bold and italic styles of your font if you plan on using them!

After selecting a style you can open your selected styles pane by clicking in the top right. You can continue to add styles by clicking the Add more styles button. The embed code that we need to get the fonts on our site is just below! Also take note of the CSS rules to specify families, as we’ll need that later as well.
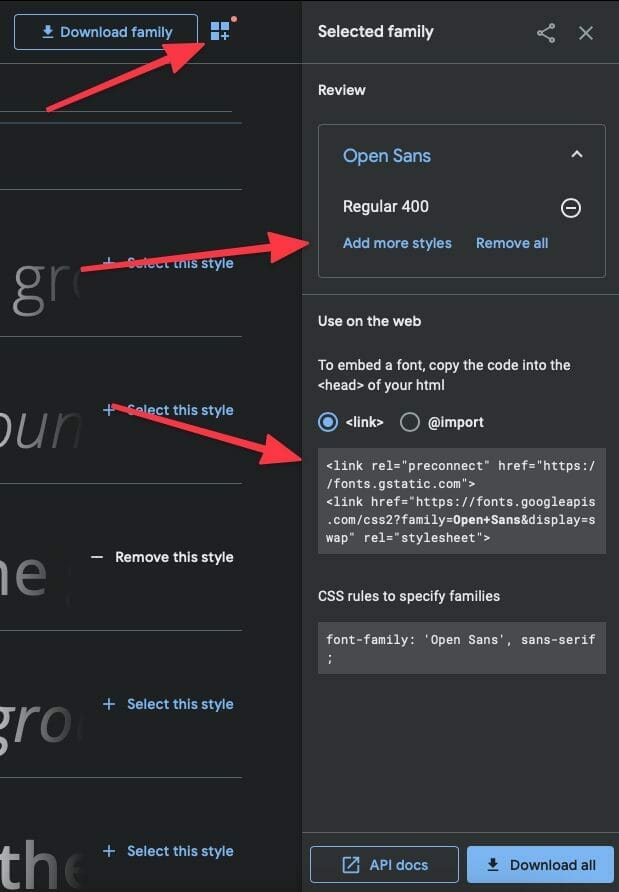
We’ve retrieved the code we need to get Open Sans displaying on our website.
<link rel="preconnect" href="https://fonts.gstatic.com">
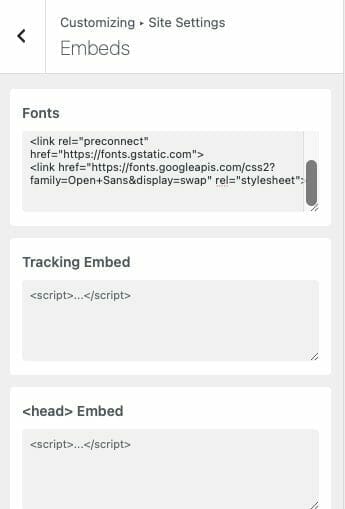
<link href="https://fonts.googleapis.com/css2?family=Open+Sans&display=swap" rel="stylesheet">Next, we go to Appearance > Customize > Site Settings > Embeds and paste our font in the font embed.
Now we have access to our font, let’s set it to one of our font options. Back to Styles and then to the Fonts area.
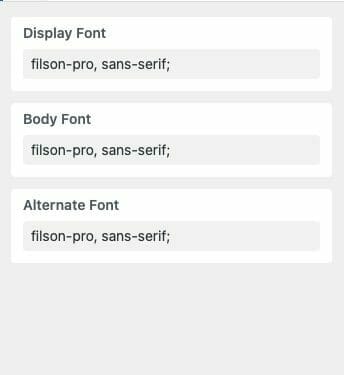
You can assign your font stack however you’d like in these three font options. From our Google Fonts Open Sans example it would look like:
'Open Sans', sans-serifFor information on adding more font options view Customizing your Customizer.
Logo & favicon
Logo
During the onboarding process you should’ve been prompted to include your favicon and logo, but in case you weren’t quite ready here’s how you do that!
Appearance > Customize > Site Details > Logo. We encourage you to upload both a reverse print (typically white) and a dark logo depending on the design needs and your color palette. SVG and PNG file formats look best here!

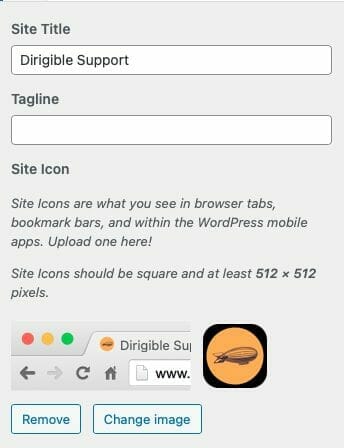
Favicon
Appearance > Customize > Site Details > Title & Favicon. This should be a PNG!
Element styles
Your site is composed of components and blocks which are in turn composed of HTML elements. You can edit the styles of these elements by visiting Appearance > Styles. This list of elements all have their own internal settings that determine the look and feel of your site. Buttons, text, and header styles can all be adjusted from these panels.