

Adding Menu Buttons
- Home ›
- Using WordPress ›
- Site Editing ›
- Adding Menu Buttons
Adding Menu Buttons
You can change any link in your page navigation to into a button.

A standard menu.
The ‘Blocks’ navigation link as a button.
Oftentimes, you’ll want to set an important link in your navigation apart from the rest. The best way to do this is to make it a button, which will adopt the button style you’ve set in your customizer. We recommend making this link either the first or last item in your menu, depending on whether you have your menu on the left or right side of your website, respectively.
Update:
You can now set a menu button directly in the Navigation setting of the customizer. This walkthrough will still work, however.
Walkthrough
Although it might seem like a simple task, there’s actually a few steps that you’ll need to walk through to first enable menu buttons, and then set one.

1 Open the Menus editor
From your admin dashboard sidebar, you’ll find the Menus editor under Appearance → Menus. If you can’t find your dashboard sidebar, you might need to toggle Fullscreen Mode.
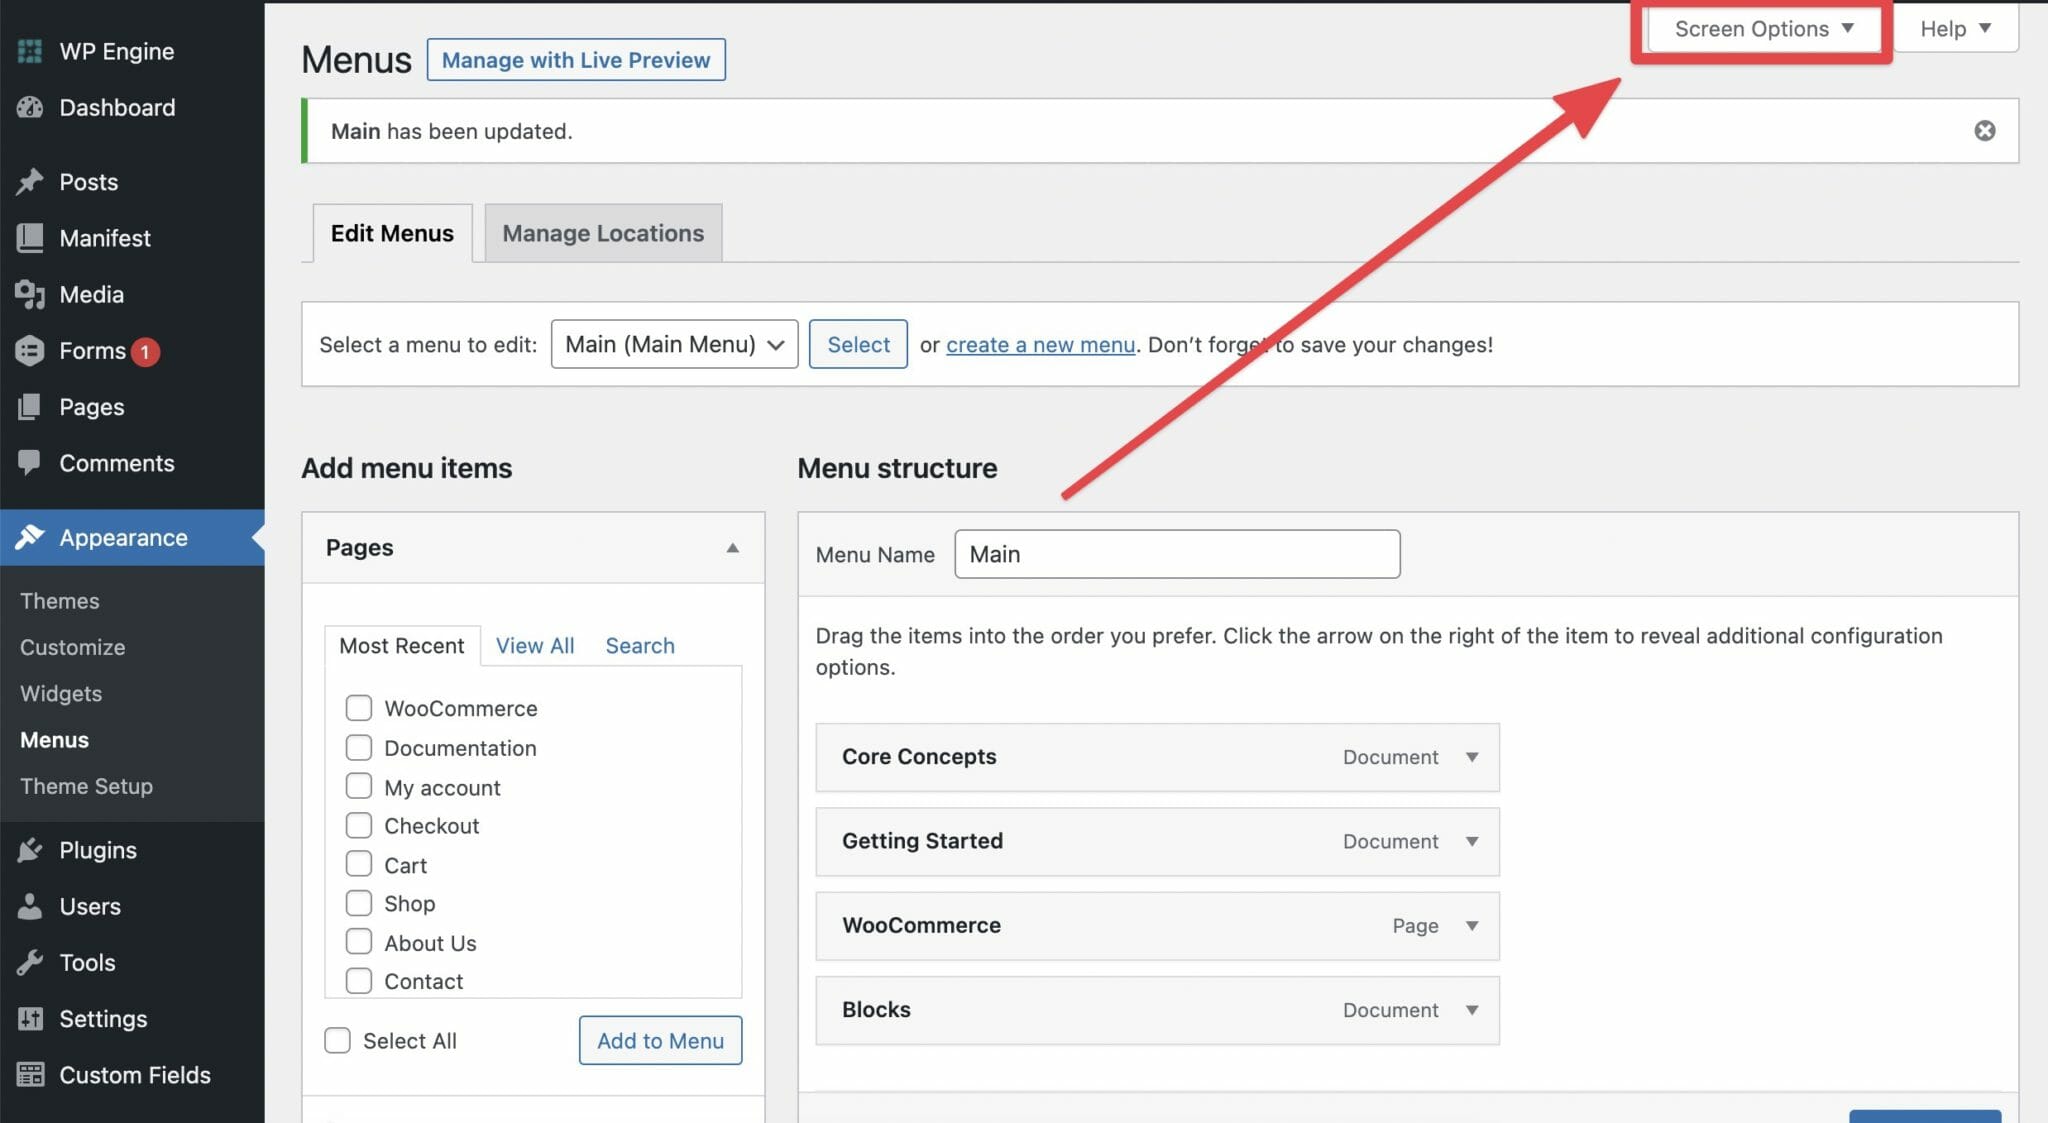
2 Open Screen Options
From the top of the Menus editor page, open Screen Options. You’ll find it in the upper righthand corner.
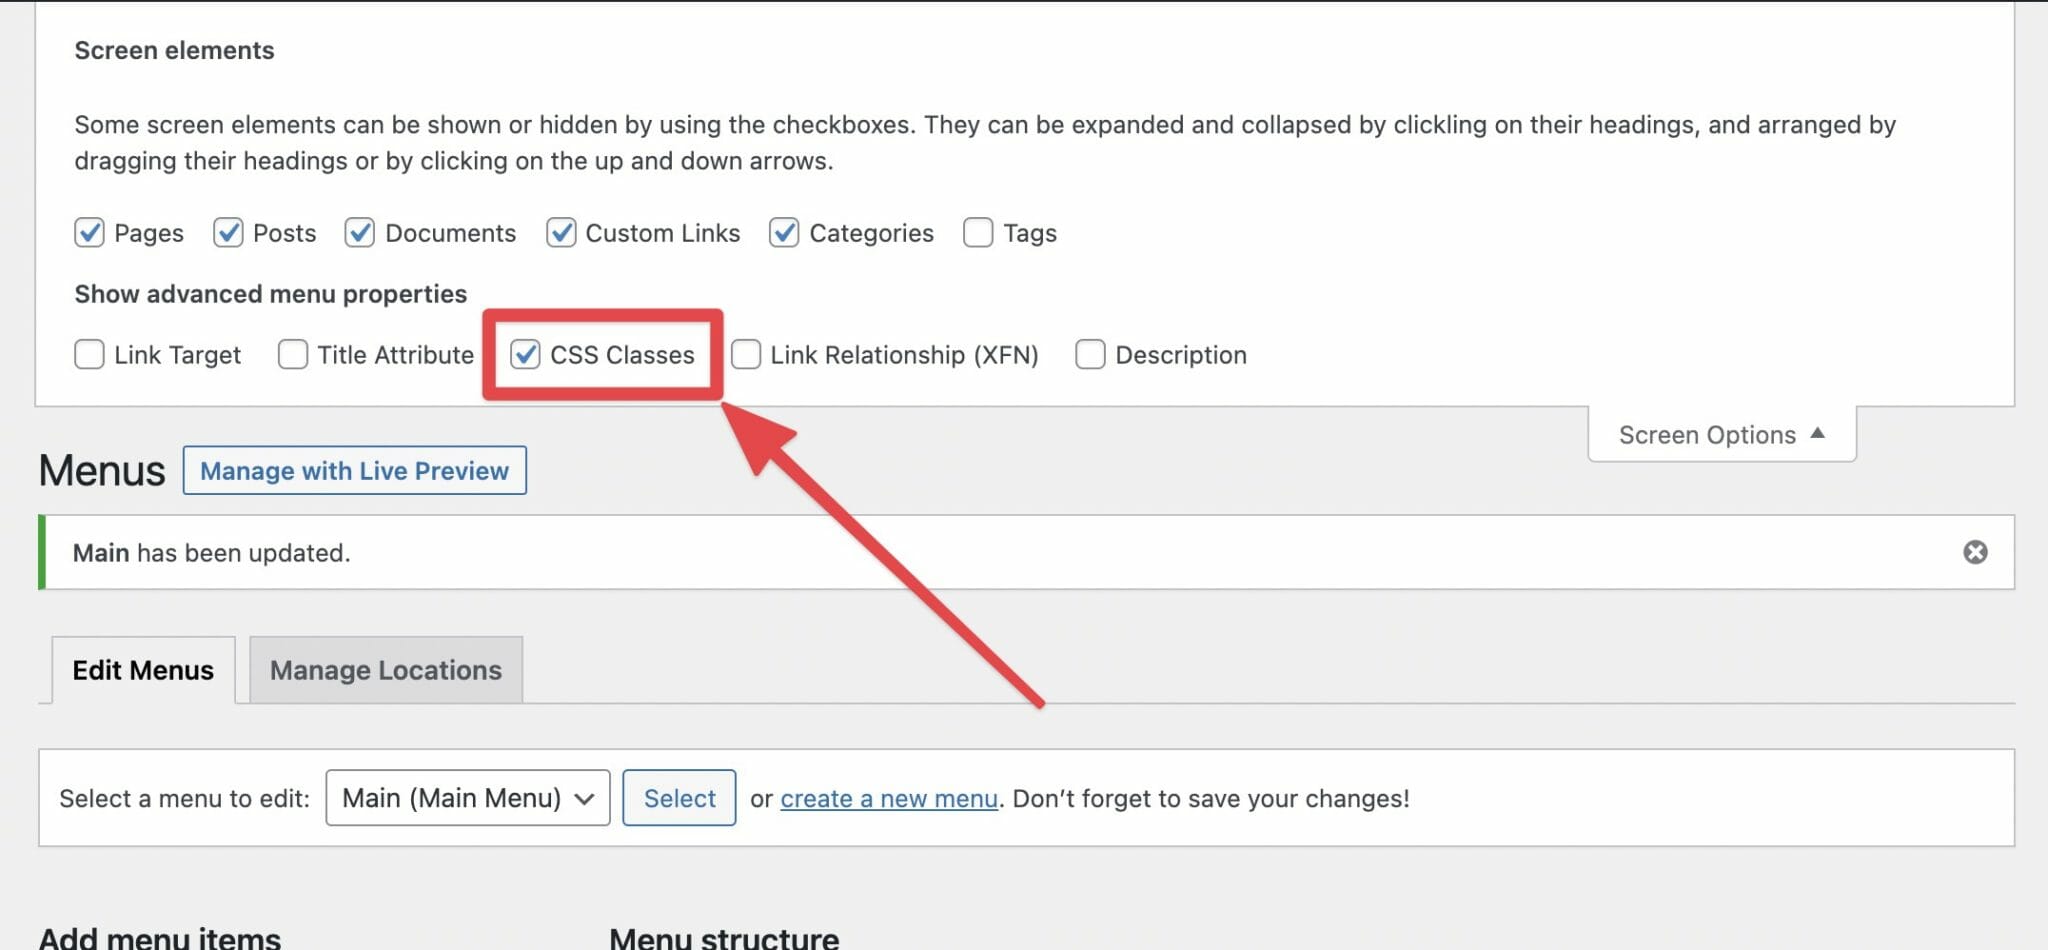
3 Enable CSS Classes
In the Screen Options pane, ensure that CSS Classes is enabled under the ‘Show advanced menu properties’ section.
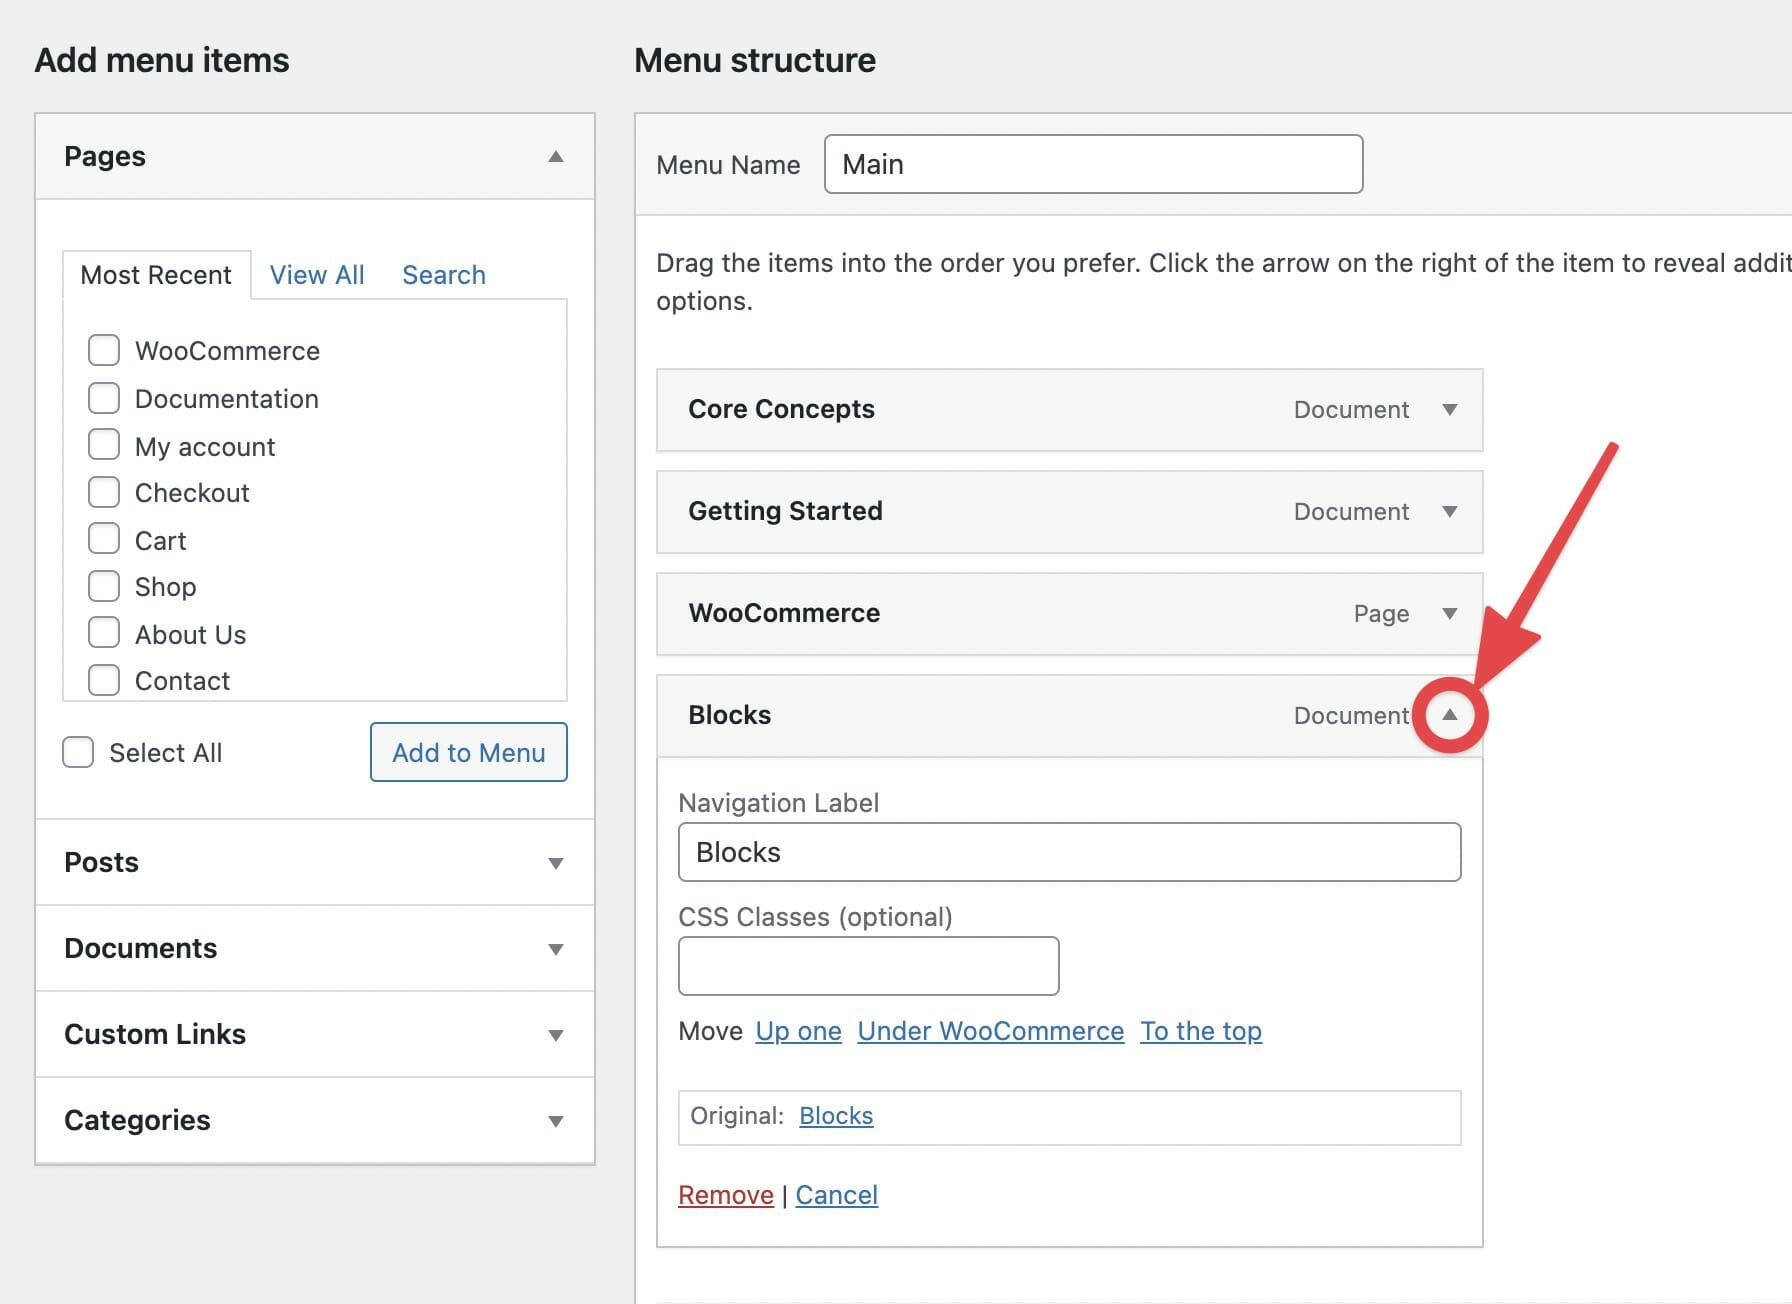
4 Open the Menu Link
Scroll back down to your menu and open advanced options for the menu link you’d like to turn into a button by by expanding it. Expand the link by clicking on the ▼ icon on it’s right hand side.
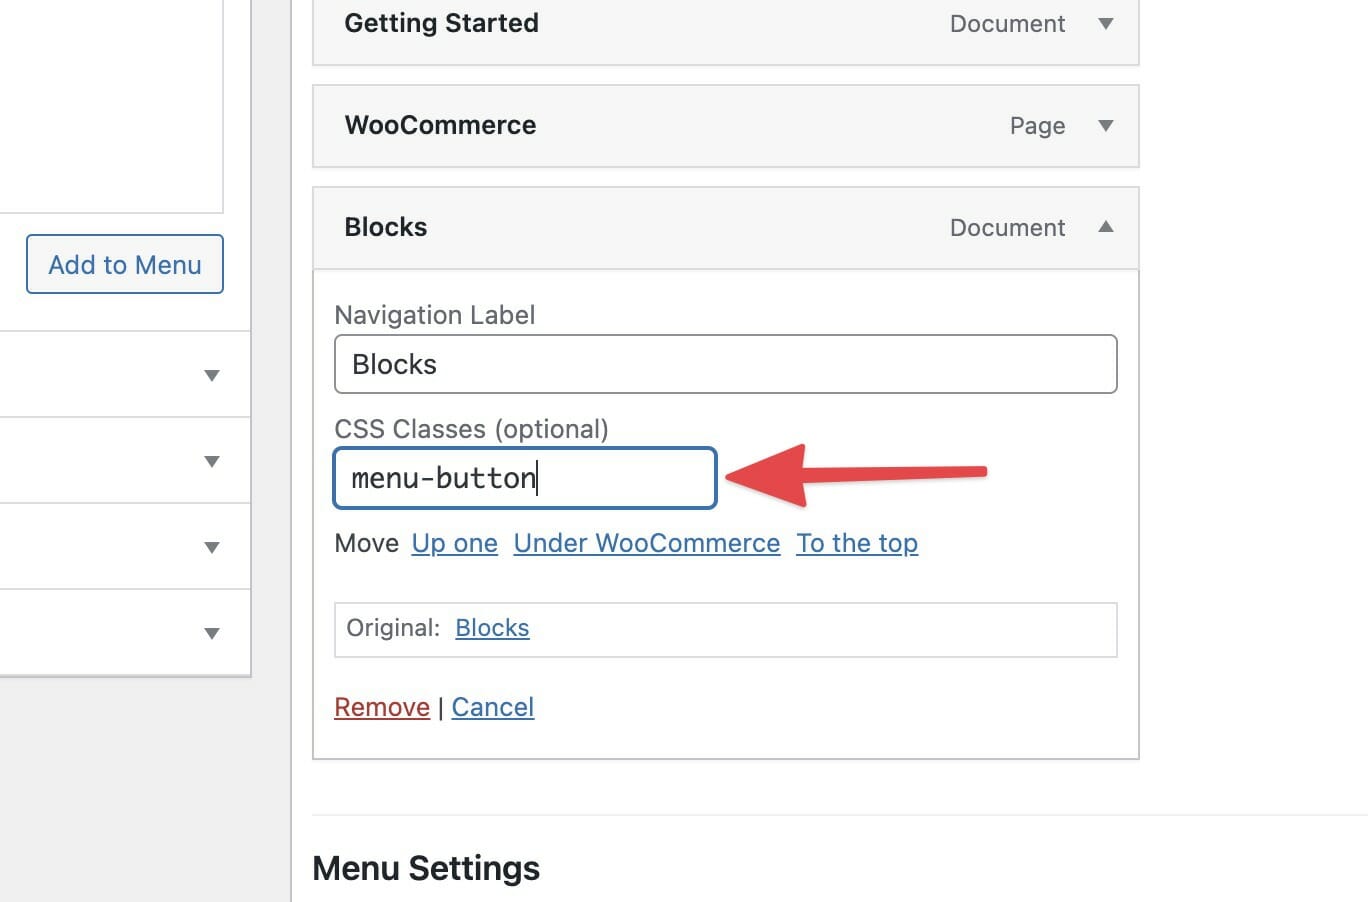
5 Add the menu-button class.
In the CSS Classes input, enter menu-button. This will add a class to the menu item on the frontend of your site that tells it to render as a button.
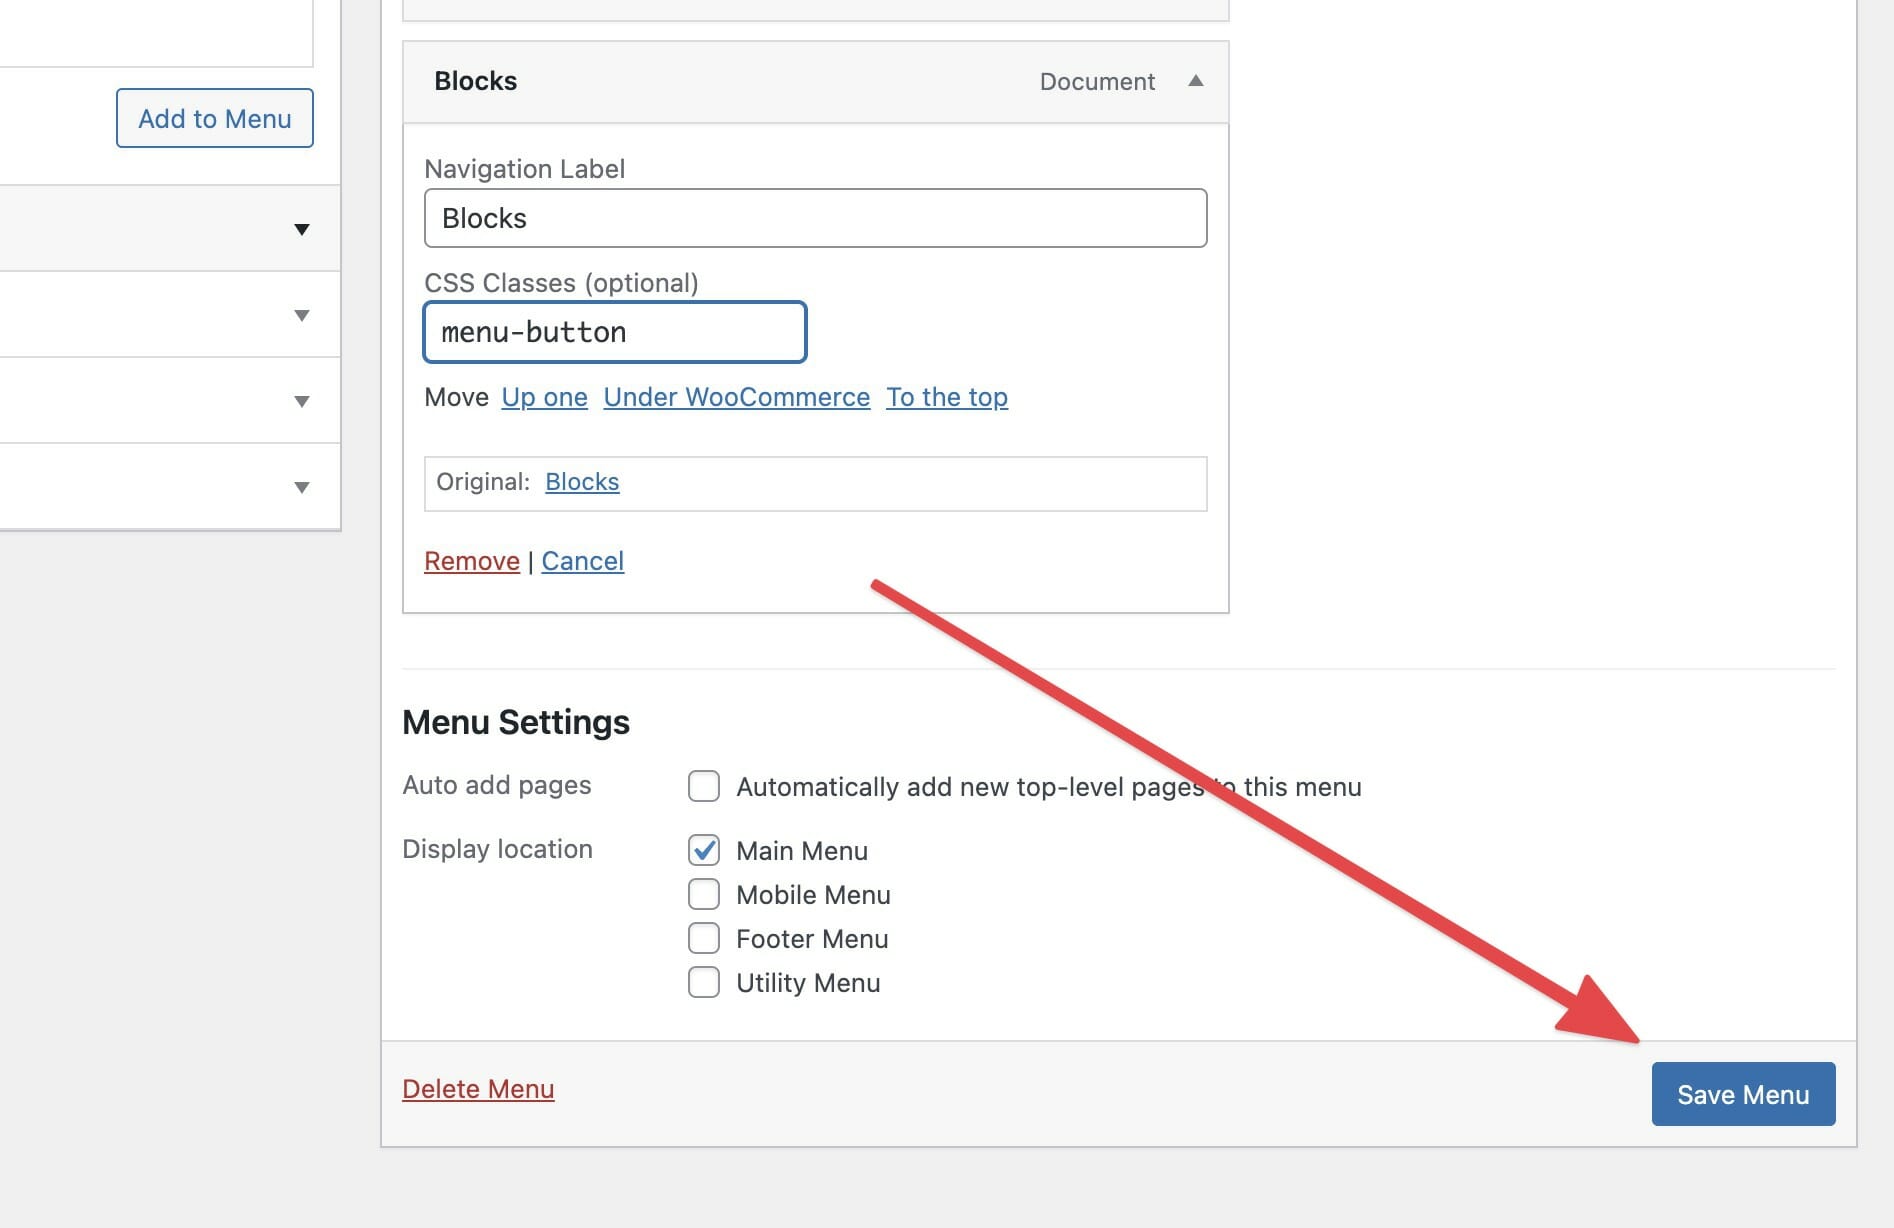
6 Save your changes.
Don’t forget to save your changes before you leave!