

Knowledgebase: Customizer
Adding social media links
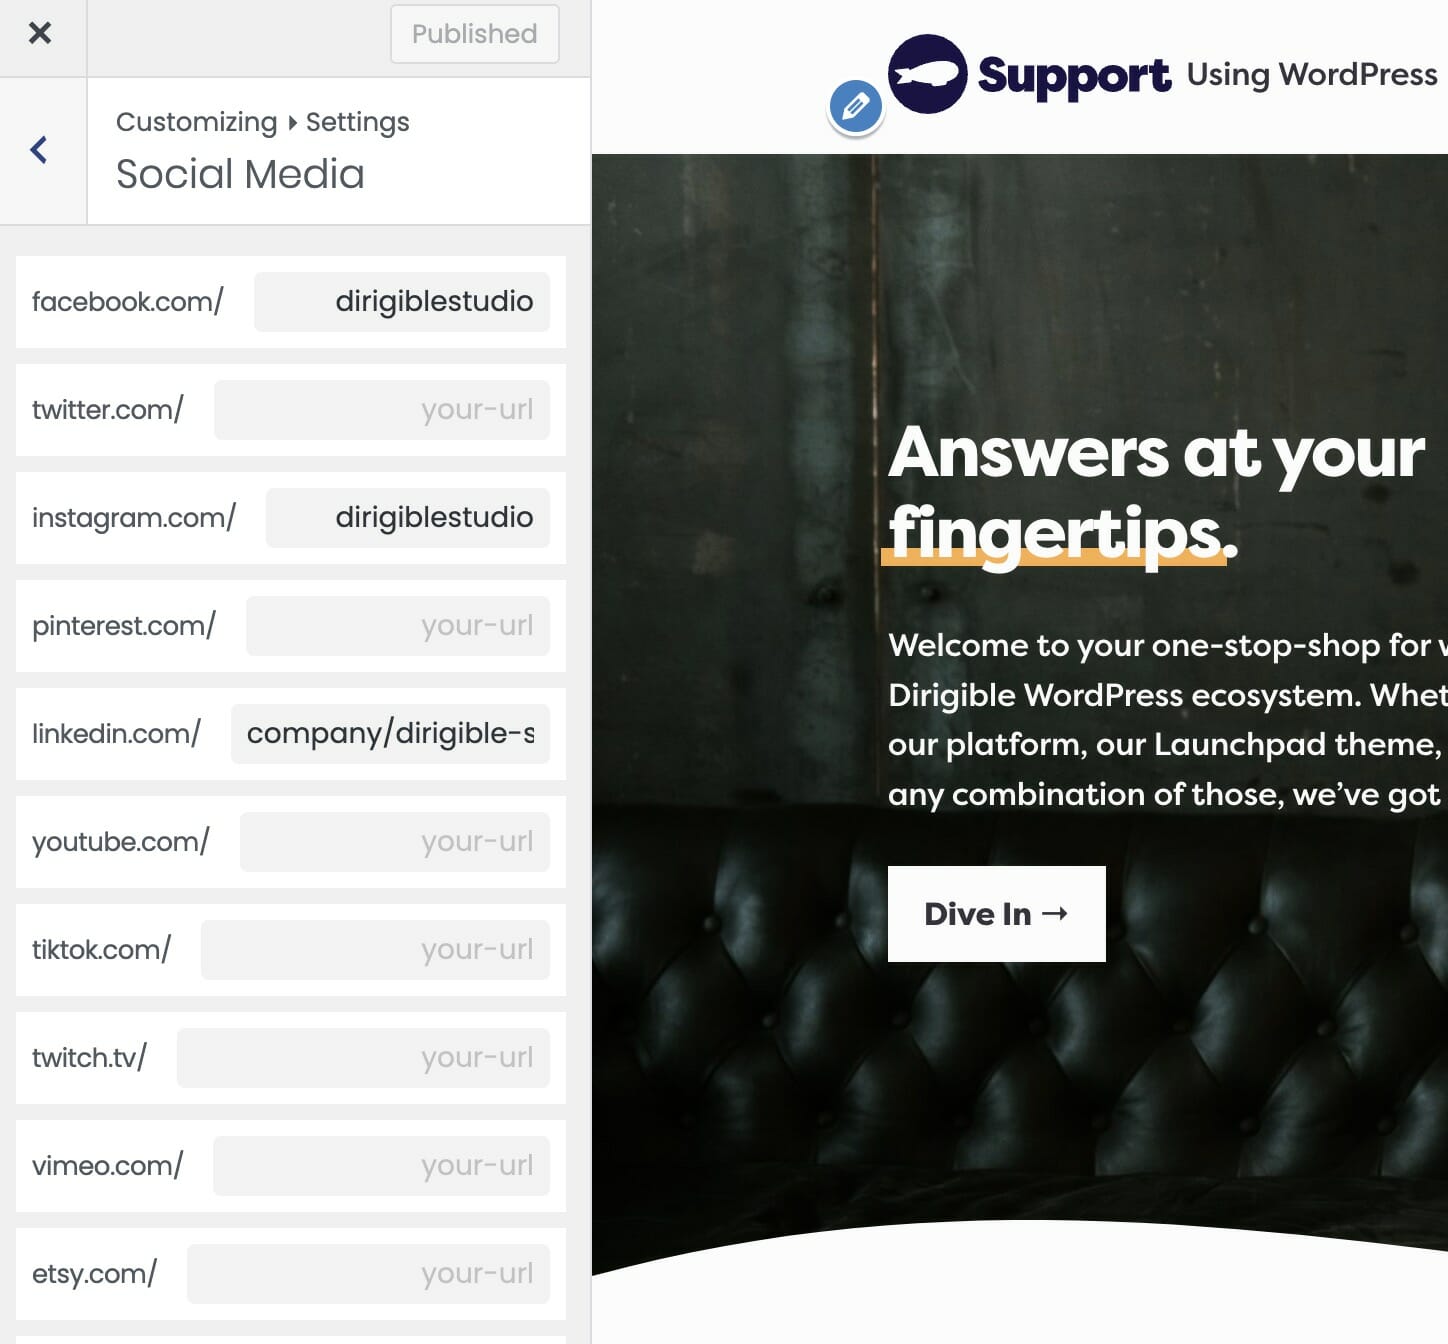
You can define your social handles in the Customizer. By defining them here, you can easily display them in your Header, Footer, Utility Bar, or anywhere on your site using our Socials block. When you update your social media here, your social links will update any place they are displayed.
You’ll find the social media settings under Appearance → Customize → Settings → Social Media. All you have to do is enter your handle, the link will be populated automatically.
In order to display your social media, you’ll have to enable the respective setting in the Customizer. The settings can be found at the following places:
Header: Appearance → Customize → Header & Menus → Desktop → Show Socials
Footer: Always Shown
Utility Nav: Appearance → Customize → Header & Menus → Utility Nav → Social Media
To display your social media on a page, you can use the Socials block. From there, you can change the alignment, size, and color of the icons. Happy editing!

How do I change my colors?
Need to change your color palette? Look no further! For more details on the customizer visit Customizing Styles.
Hello everyone! My name is Jake, and I’m a partner and developer at Dirigible Studio. Today, I’ll show you how to make simple color changes using the Customizer in Dirigible. Let’s get started:
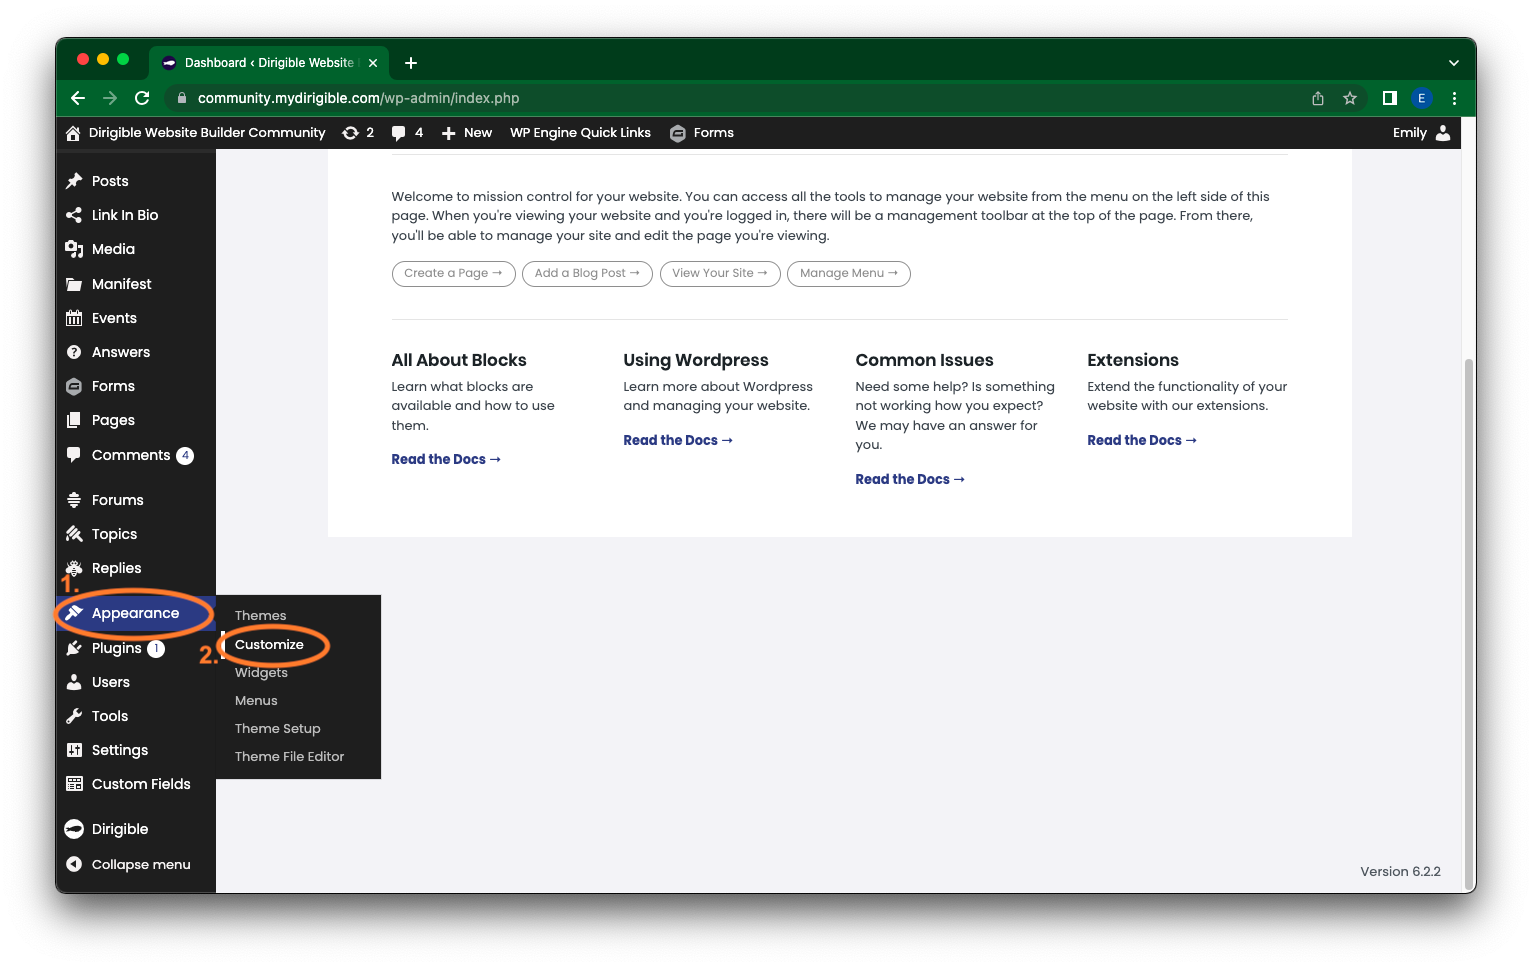
- Go to the Customizer by clicking on “Customize” in the WordPress admin bar or by navigating to “Appearance” and selecting “Customize.”
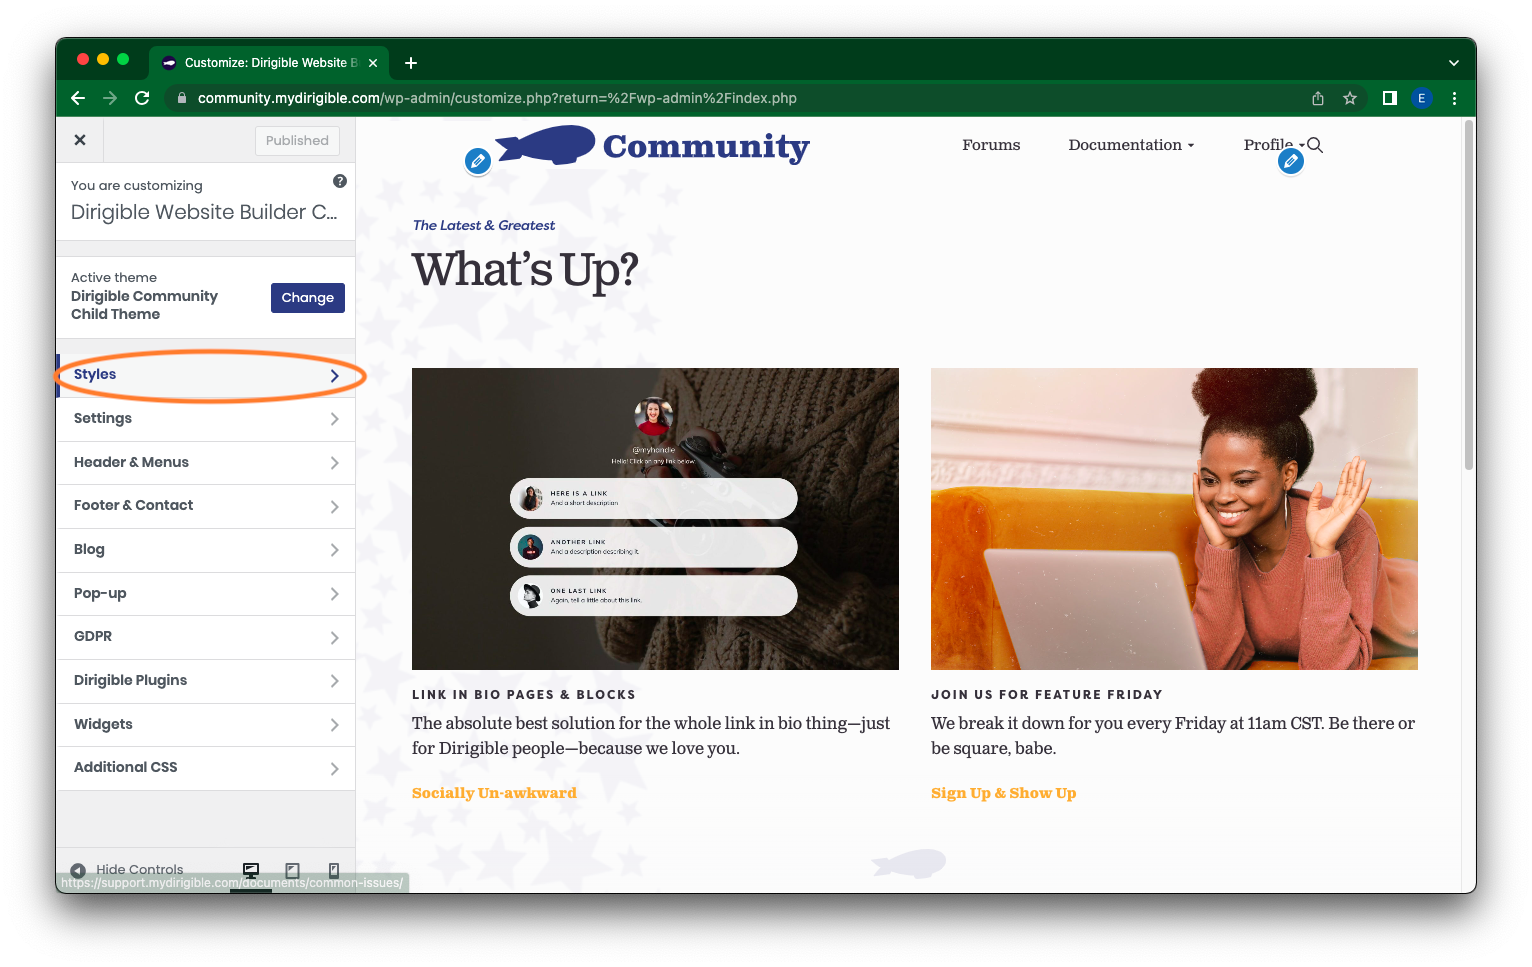
- In the Customizer, find the “Styles” section and click on it.
- Within the “Styles” section, locate and click on “Palette.” This is where you can change various colors on your site.
- Scroll down to view the different color options available in the palette.
- For example, let’s change the “Secondary” color, which is often used for buttons on your site.
- Adjust the sliders or color pickers to select a different shade or hue for the secondary color. You can make it more vibrant or less pastel, depending on your preference.
- As you make changes, you’ll notice that the colors on your site update in real-time, allowing you to preview the changes.
- Continue making adjustments until you’re satisfied with the new color.
- Next, you can modify the “Accent” color, which is used in various elements throughout your site.
- Similarly, use the color picker or sliders to select a different shade or hue for the accent color.
- Preview the changes on your site to see how they look.
- Once you’re happy with the new colors, click on the “Publish” button to make the changes live on your site.
- Until you publish the changes, they will only be visible to you, allowing you to experiment and make adjustments without affecting the live site.
- That’s it! You’ve successfully changed the colors on your site using the Customizer’s palette menu.
- Remember, you can modify other colors as well to ensure a consistent and cohesive look throughout your site.
I hope this guide helps you customize your site’s colors easily. If you have any further questions, feel free to ask. Thank you!
How Do I Change My Font Sizes in WordPress?
3 Ways to Change Your Text Size
On your Dirigible site, you are able to control every aspect of your design and layout – so your site can truly reflect your brand identity. You can customize your website by adding photos, arranging the layout, and setting your colors, to name a few. One of the simplest and most powerful changes you can make is setting the size of your text. Making sure that your site’s type is legible is important for accessibility and usability.
There are three main ways to adjust your text size.
- In the customizer – this will make global changes to your text sizes
- In the block settings – this will change your text size in that particular block
- Using paragraph and headers in the block editor – this will change your text size for a specific piece of text
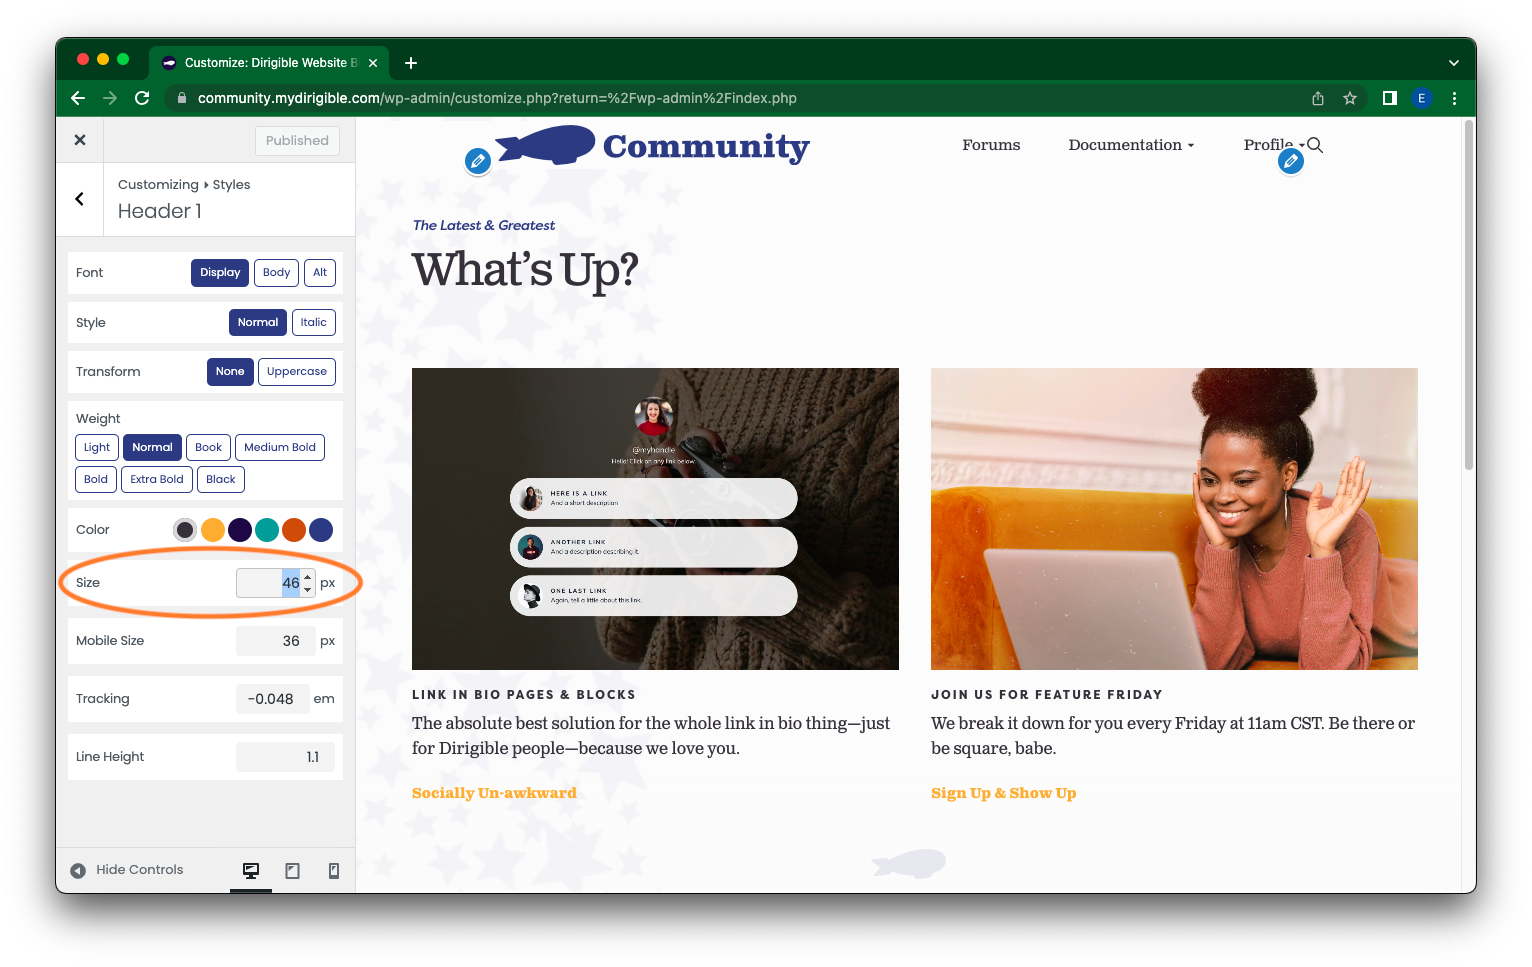
How to Change Font Sizes in the Customizer:
- In your Dashboard, on the left hand-side, scroll down and click on Appearances. Then select Customize.
- In the side menu, select Styles.
- From here you can now edit your Headers and Paragraphs by clicking on which you want to adjust or change in the left menu. This is effectively setting presets for your website’s text.
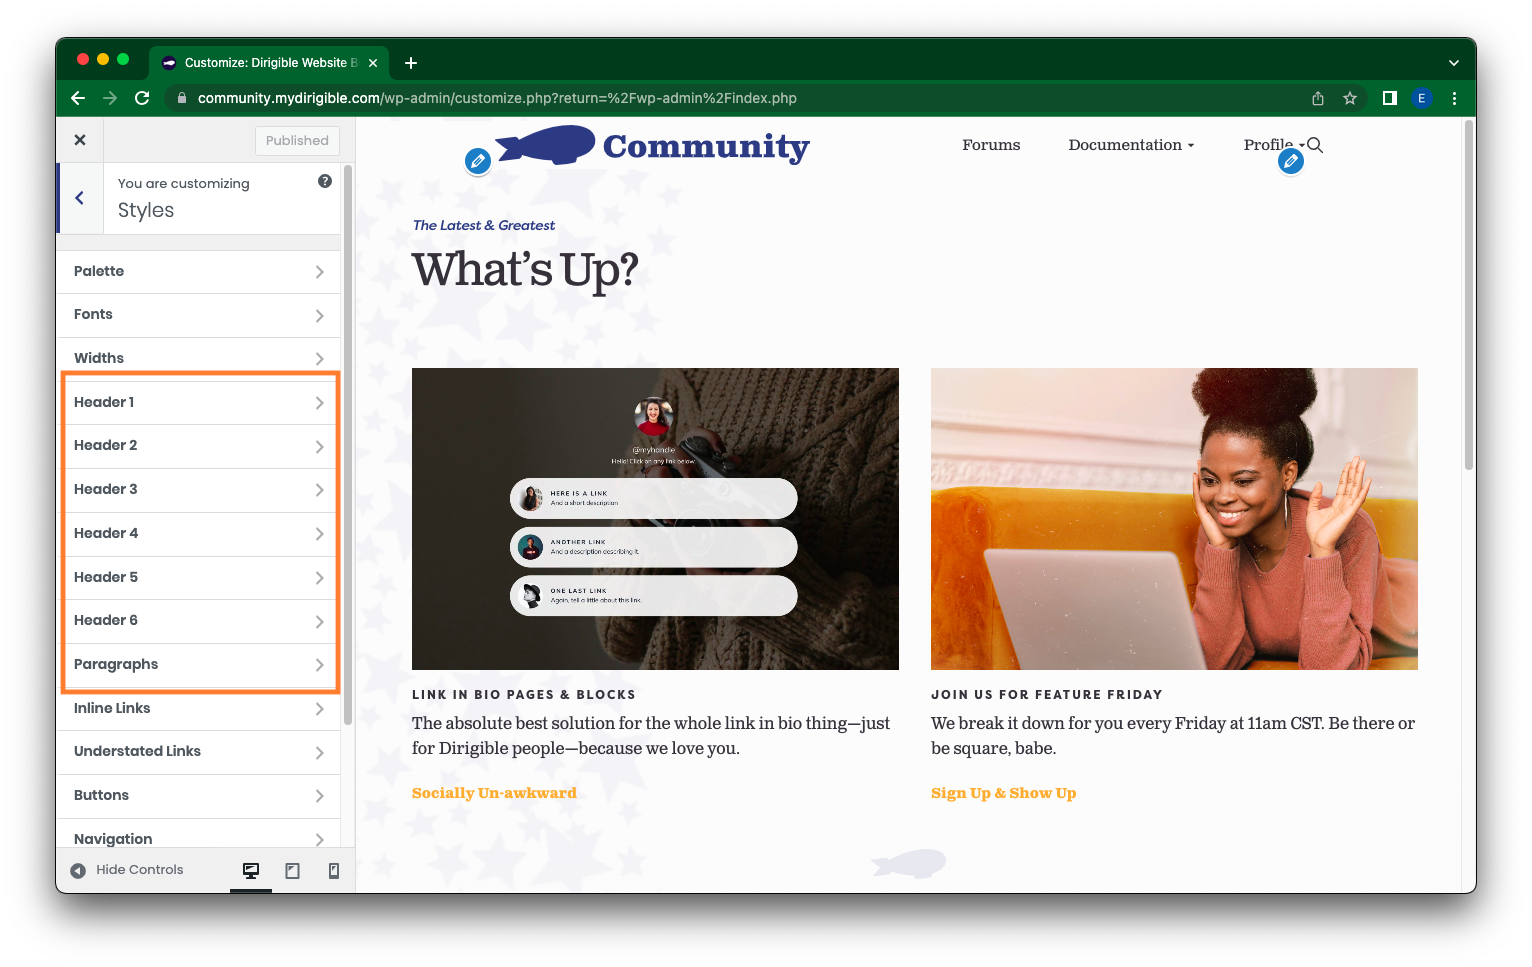
- Once you have made your selection, on the left-hand side navigate to the Size category to make your adjustments either by typing in a value or using the up and down arrows on the side. You can also customize your Paragraphs and Headers presets here in other ways like Color and Weight if you so wish.

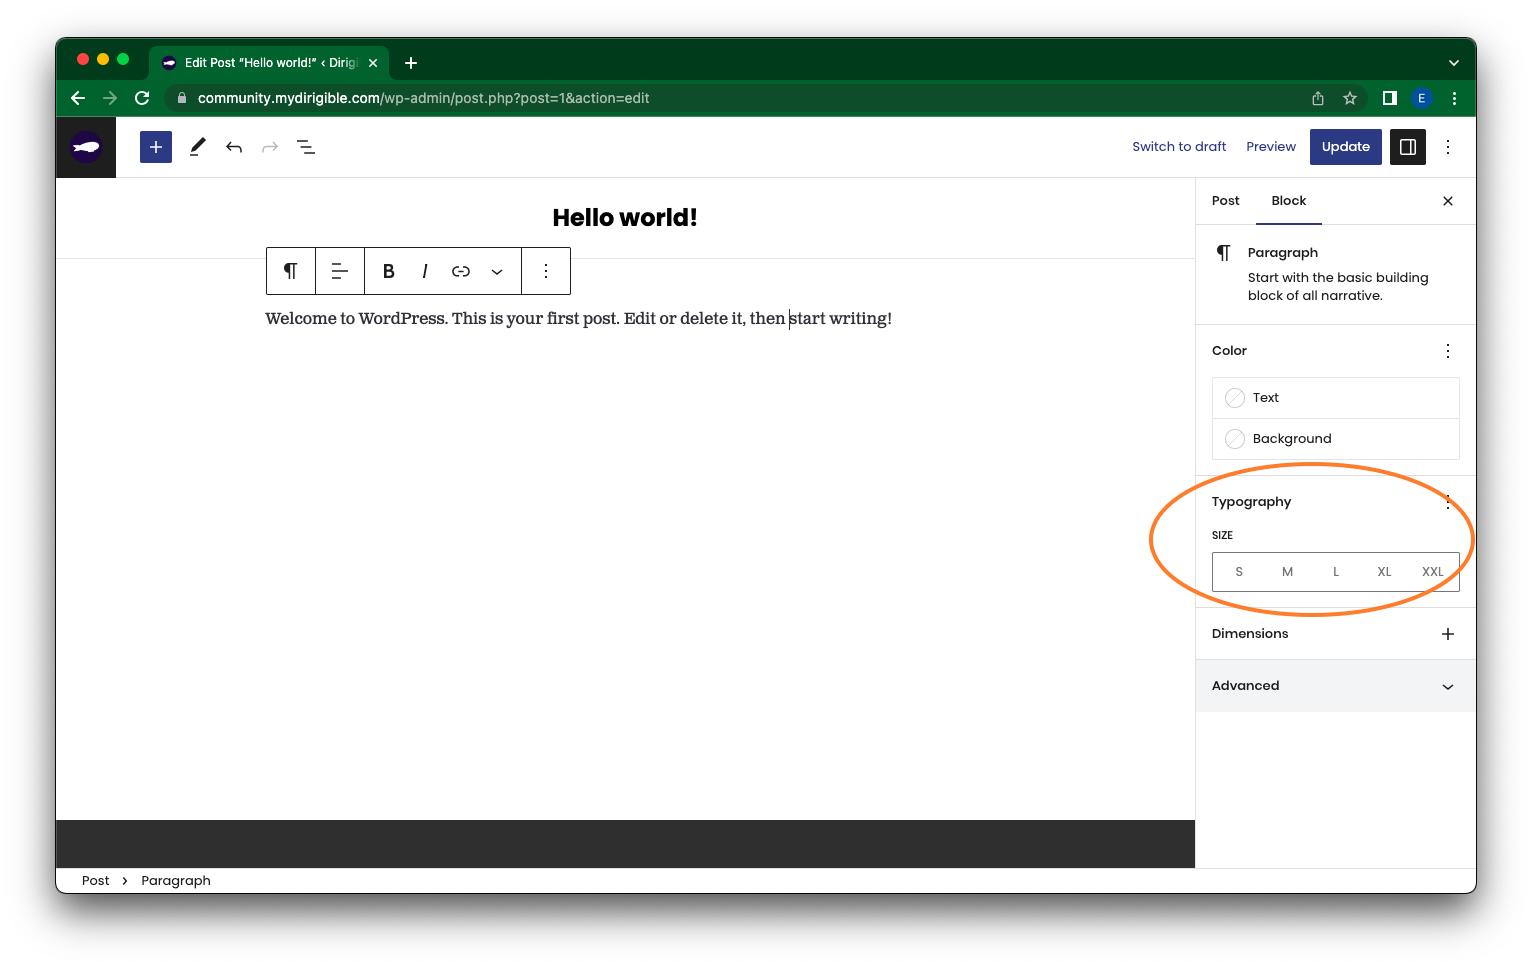
How to Change Font Size in Block Settings:
- Select the paragraph block where you want to adjust the font size.
- Then on the right-hand side under Block, there is a category labeled Typography with a size selection bar underneath. The options are Small, Medium, Large, Extra Large, and Extra Extra Large. Select your preferred font size.
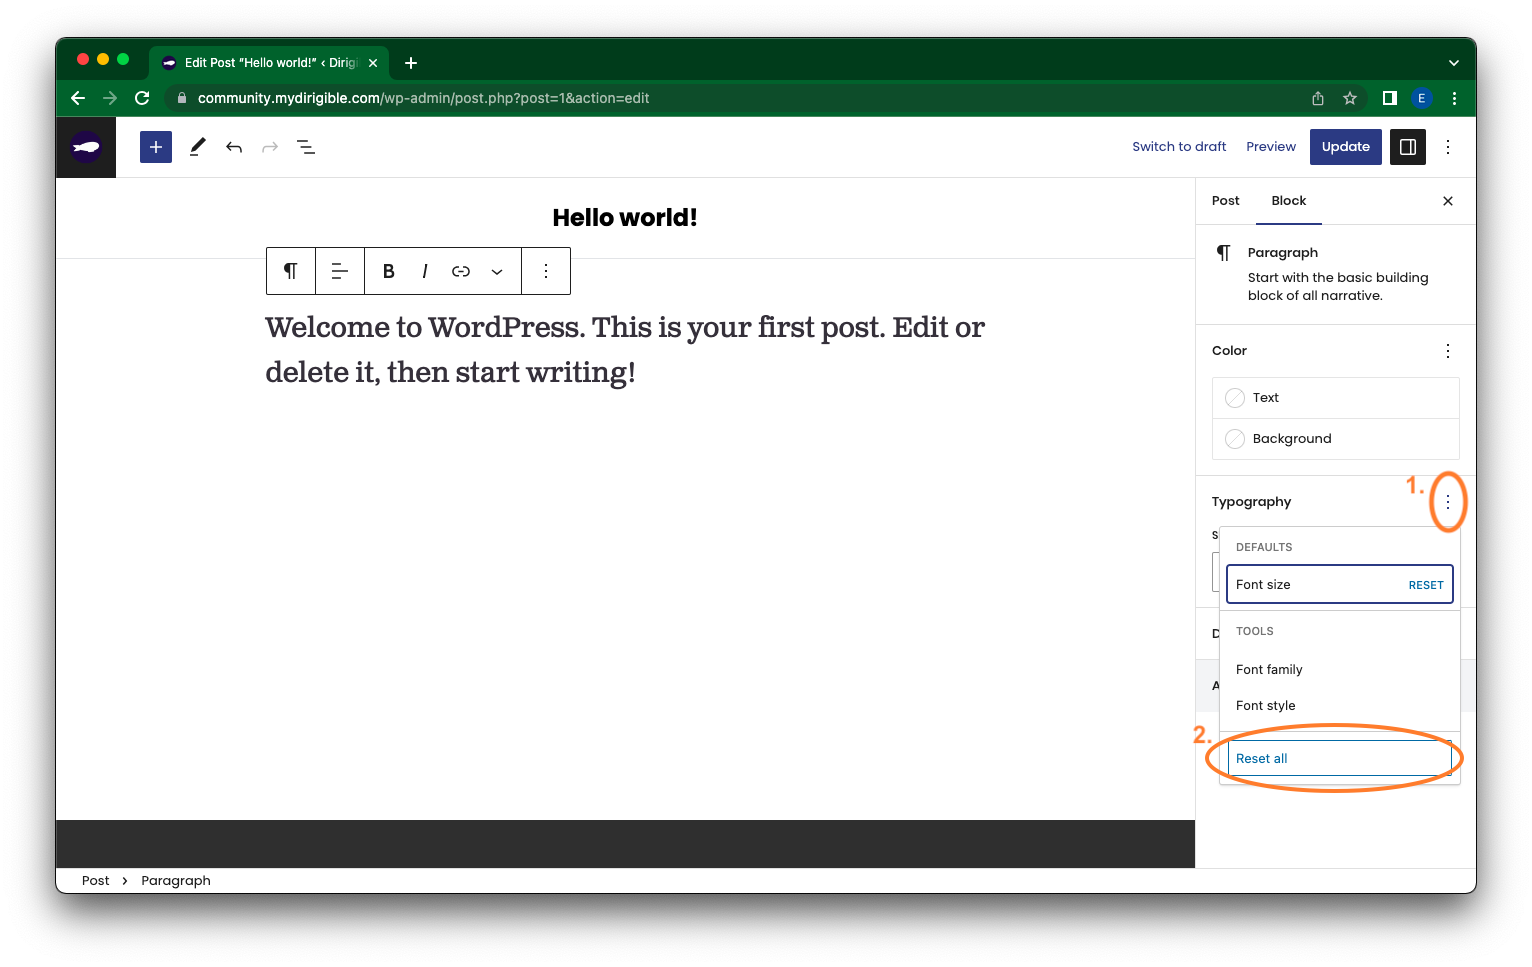
- If for whatever reason you change your mind, just select a different size or you can rest by clicking on the three vertically arranged dots next to Typography and select Reset all at the bottom of the drop down menu.
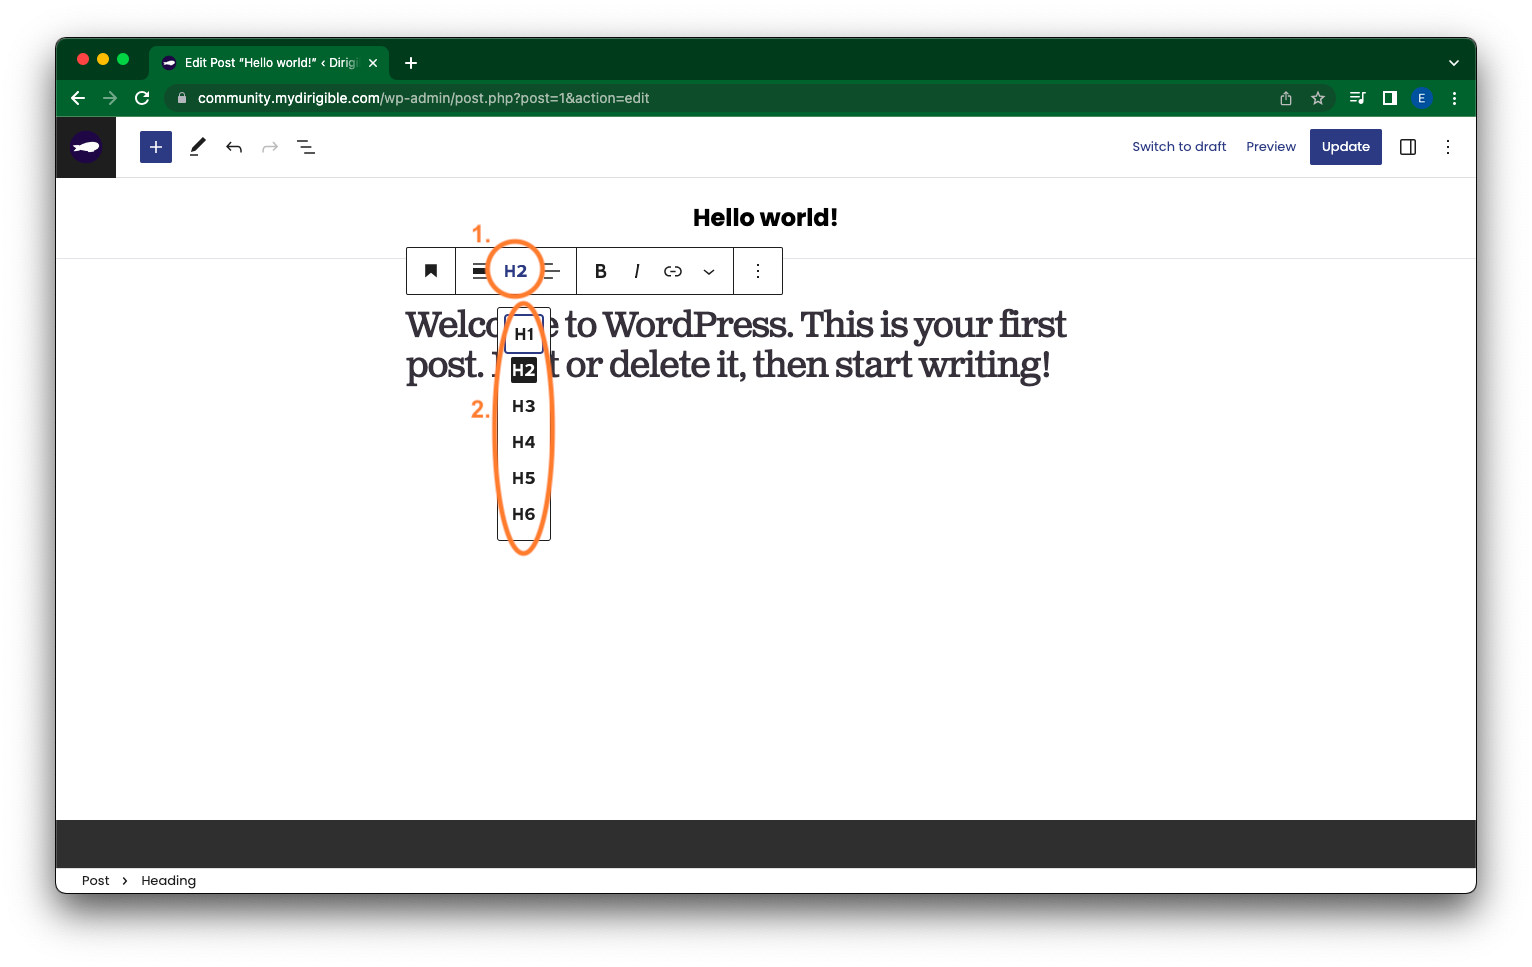
How to Change Font Size Using Paragraph Headings:
- Highlight the section of text and/or select the block you want to adjust. In the Customizer click on the paragraph icon on the right of the menu.
- Select Header in the drop down menu.
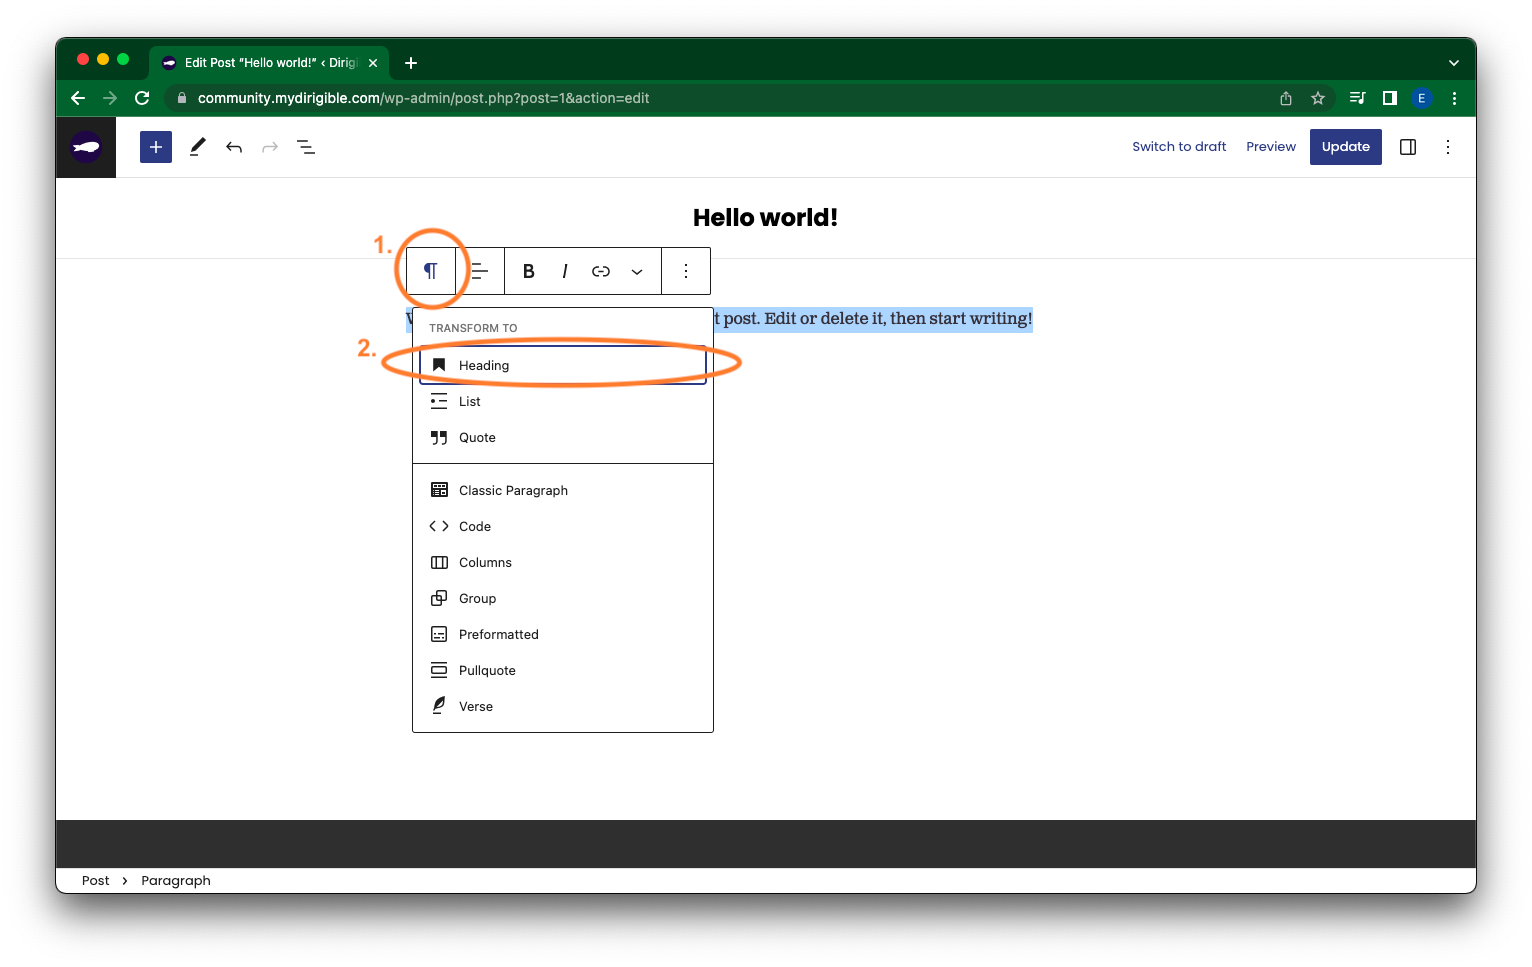
- Now, in the customizer you can adjust the preset heading by selecting H1, H2, H3, H4, H5, or H6.
Hopefully these methods help and get you one step closer to getting your site looking the way you want it to!
If you found this helpful and want to learn more about using your website and how to market your brand – sign up for our Website Building 101 course with Dirigible!
How To Add/Update a Button on Your Site’s Main Menu
Adding a custom button to the top of your site is a great way to drive attention and encourage your users to take a specific action, such as contacting support, signing up, or navigating to a key page. Follow the steps below to add (or edit) a button to your site’s main menu from the Customizer.
- From your website’s dashboard, navigate to Appearance > Customize. This will open the Customizer panel.
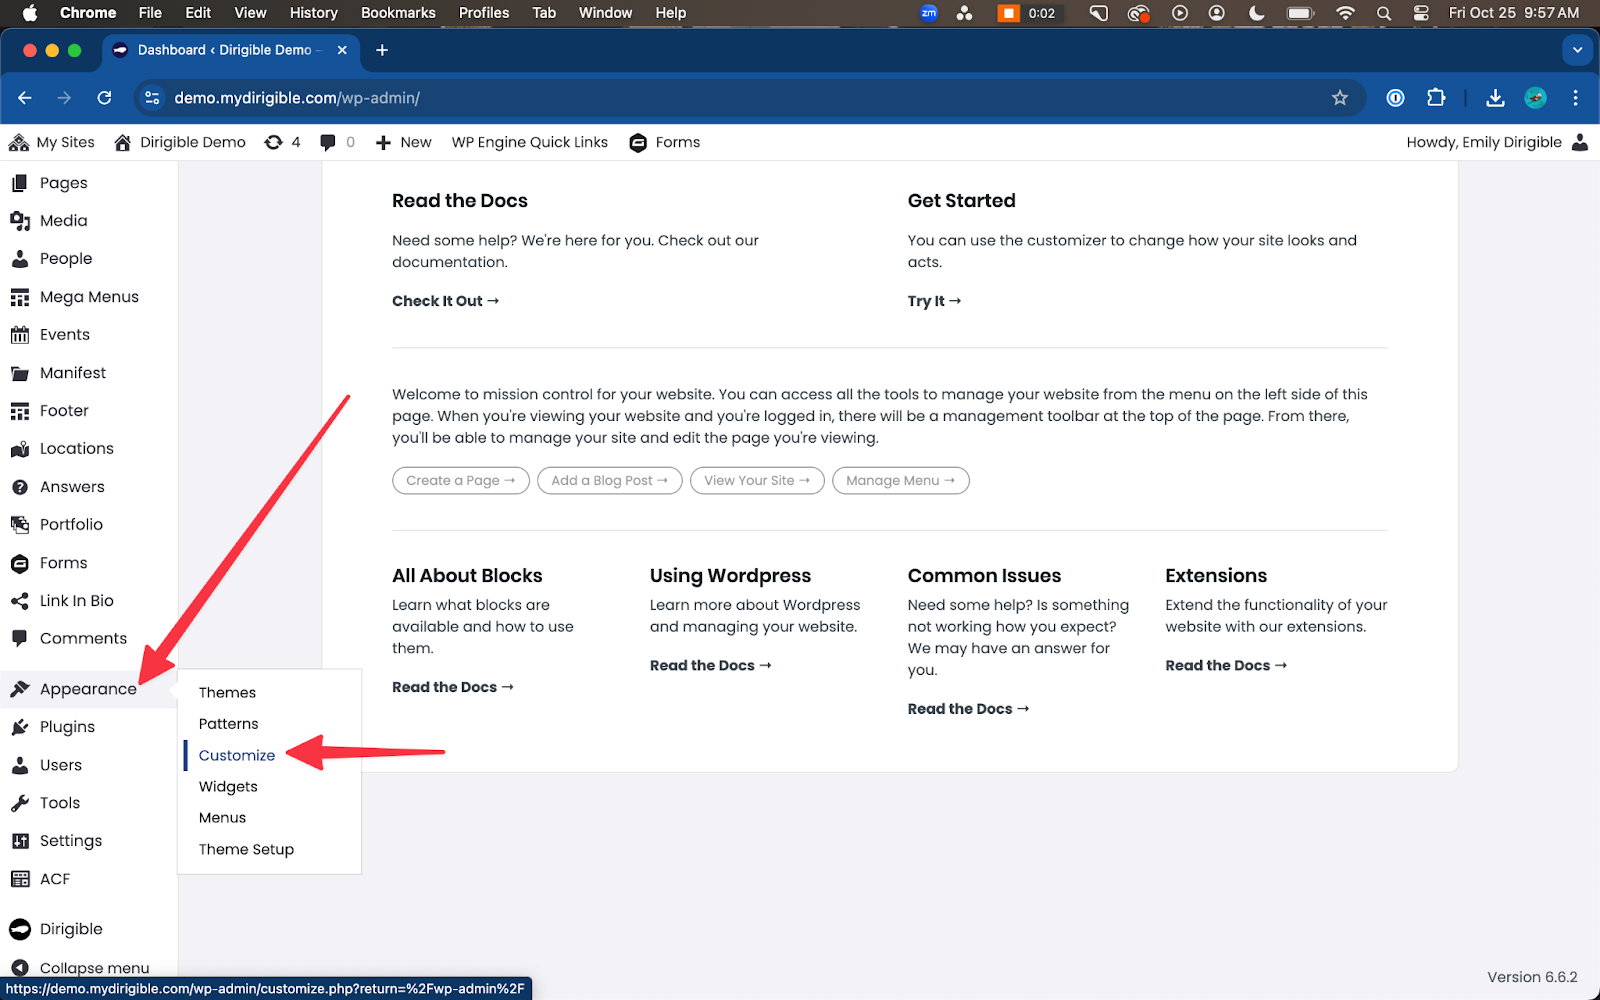
- Click on Header & Menus. This section allows you to adjust your website’s header and menu settings for both desktop and mobile views.
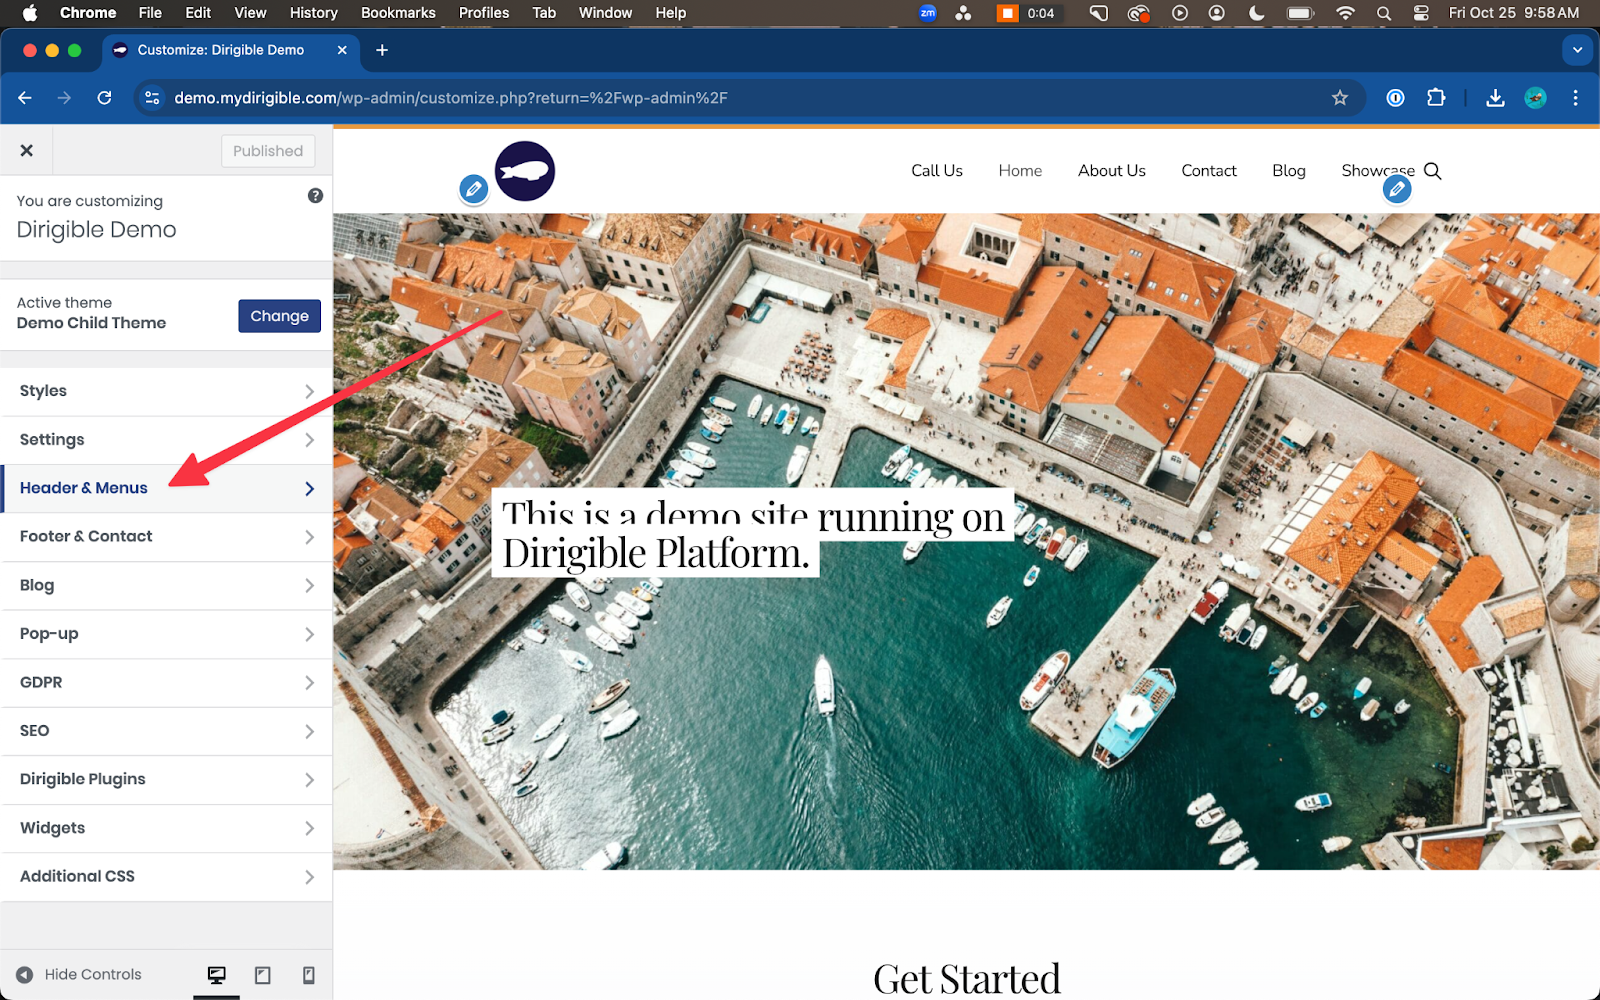
- Click on Button to open the button-specific customization options.
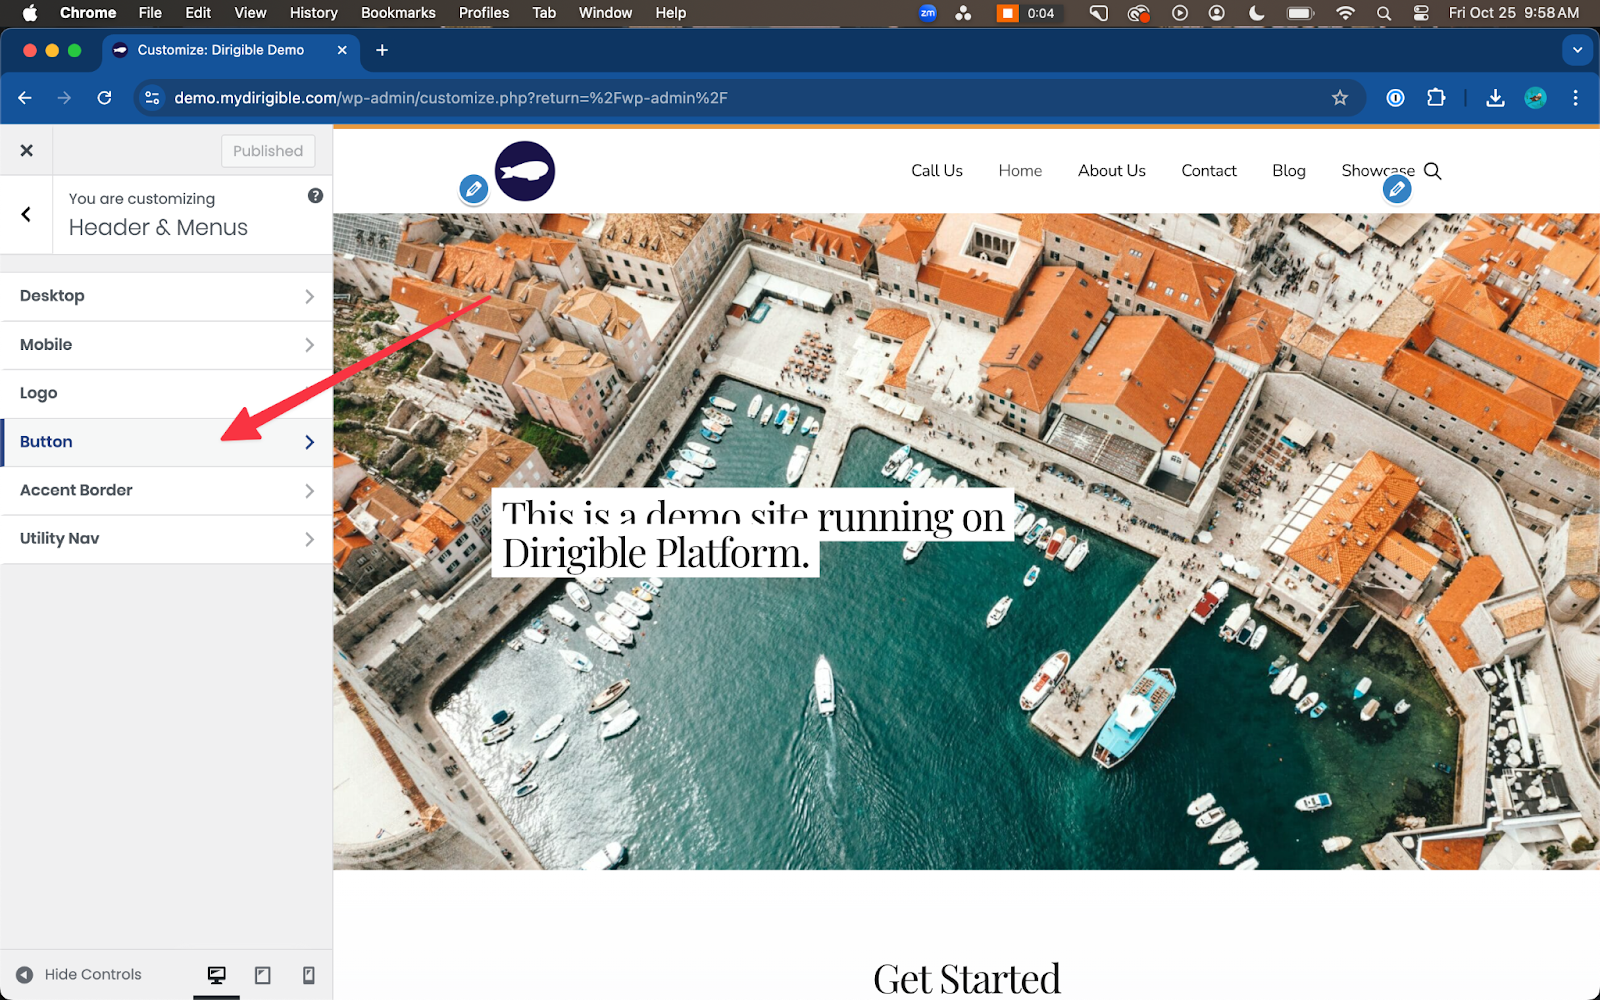
- Here is where you will find the various setting fields to customize your Main Menu’s button—adding Text and a URL as well as selecting Style. Be sure to toggle on Enable.
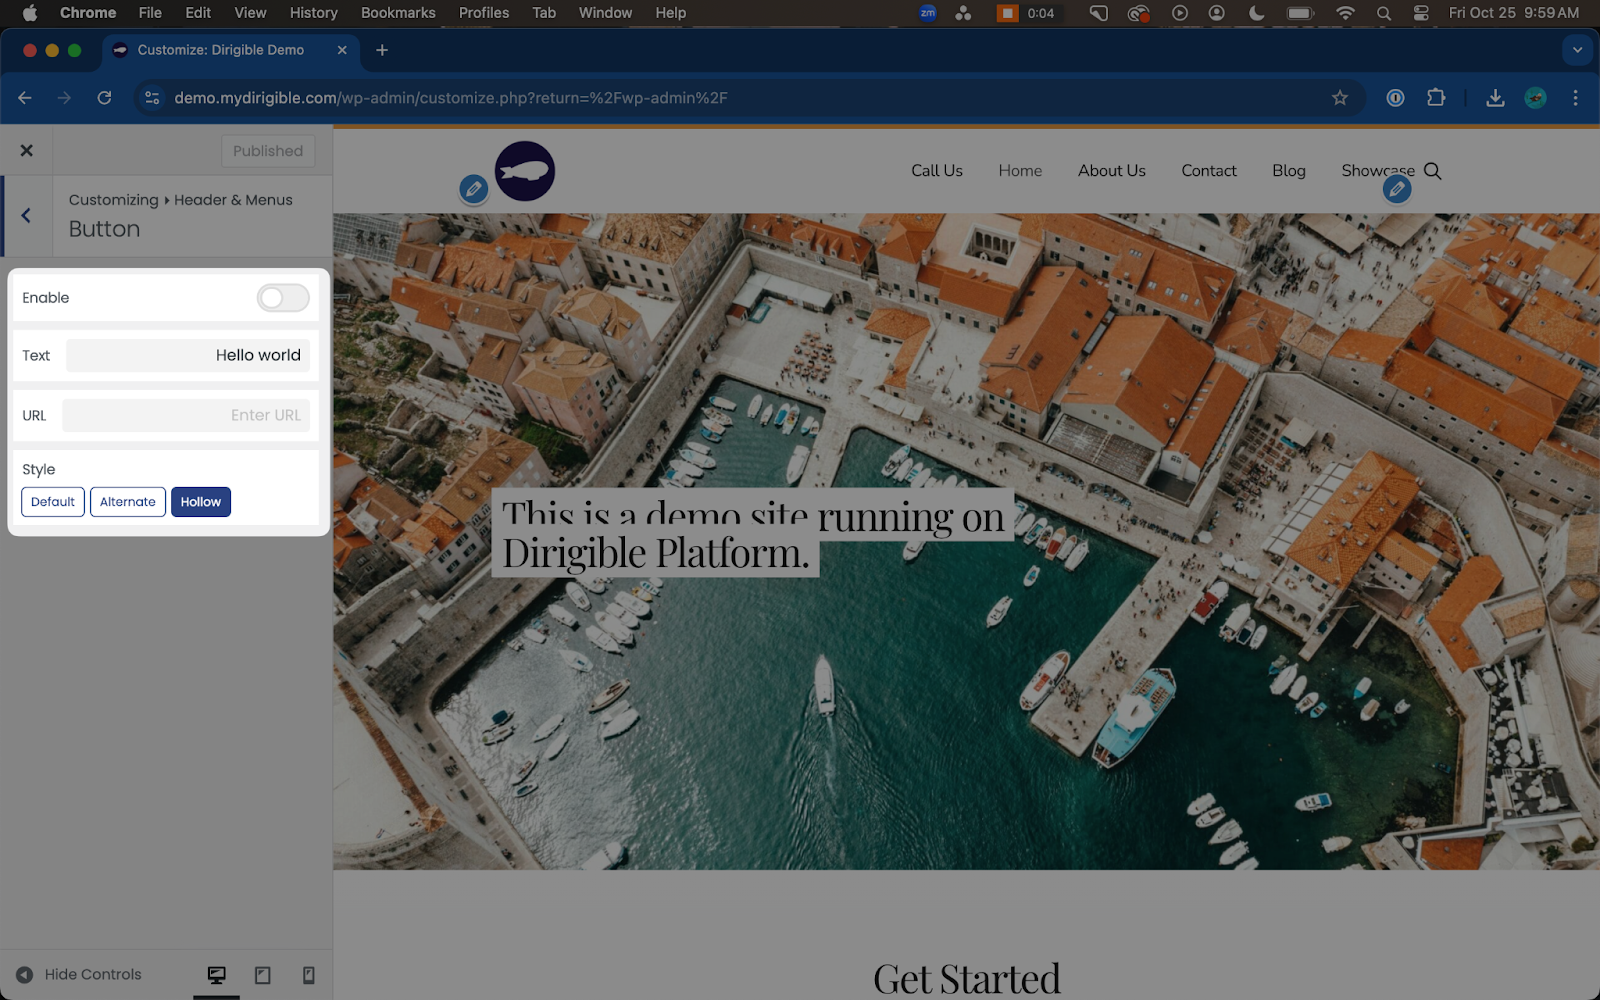
- After making selections and hitting Publish/Update, be sure to visit your site on mobile and desktop to confirm the button works and looks how you want it to.