

Image Focal Points
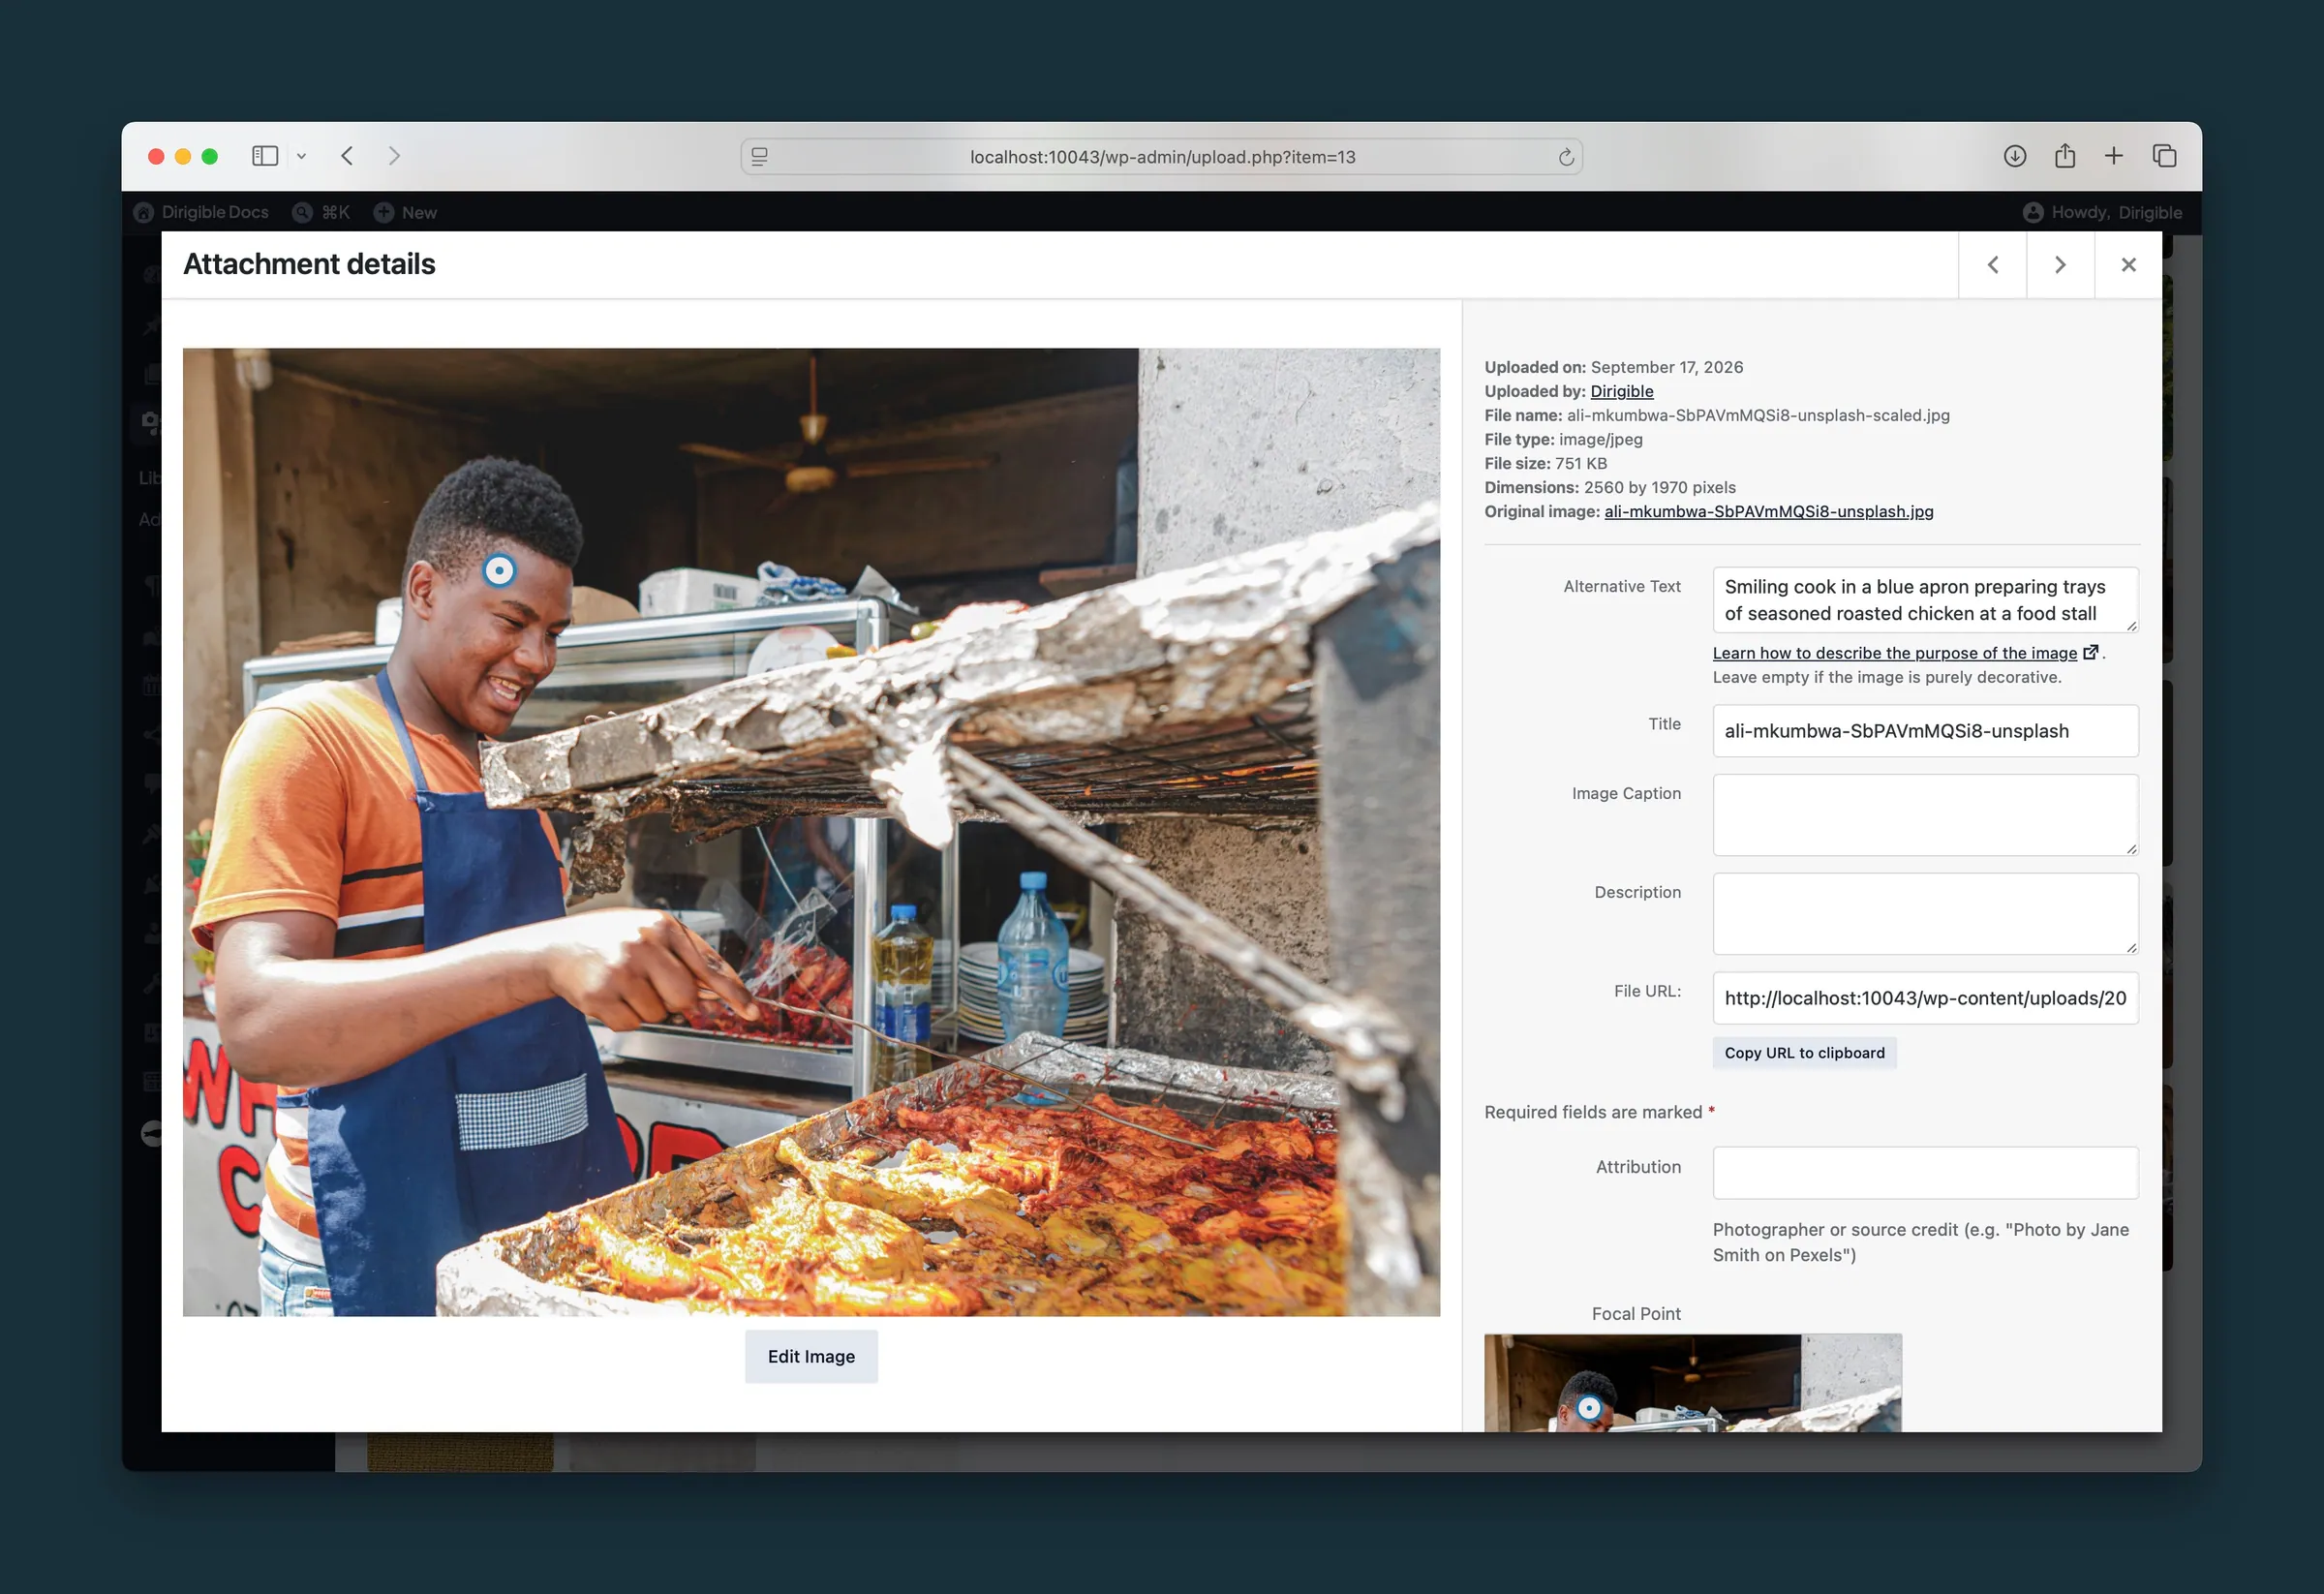
What it helps you do
Set where an image should stay centered when it is cropped to different shapes and sizes. A portrait stays on the face, a product shot stays on the label, and hero crops feel intentional instead of cutting off what matters.
Where to find it
- Media Library — open any image. The large preview and the Focal Point field in the sidebar both show a blue marker.
- Select Media or Edit Gallery — choose an image in the modal. The Attachment Details sidebar includes a Focal Point preview.
- Edit more details — from a media modal, open the classic attachment edit screen. The Focal Point field appears below the description.
- Post editor — after you set a Featured image, click the preview in the sidebar to adjust its focal point.
How to use it
- Open the image in any of the places above.
- Click the preview where you want the focus to stay, or type X and Y percentages (0–100, decimals allowed).
- Switch to another image and back to confirm the marker stayed put.
You do not need to click Save on the classic attachment screen — focal point changes save on their own.
What happens automatically
- Focal points are stored on the image itself. Change it once and the places that crop the image follow the new position: archive cards and other featured images, Image blocks, Hero Slider, and Dirigible blocks such as Section, Hero, and Grid cards.
- If you never set a point, the image defaults to the center (50%, 50%).
- A brief green outline confirms when a save completes in the post editor.
Things to know
- The blue marker is a guide for cropping — it does not move the whole image on the page by itself.
- SVG images work in the picker; very wide or viewBox-only files still show a usable preview.
- A block can have its own focal point. Move the focal point picker in the block's sidebar and that block keeps its own crop, while everything else keeps following the image. The Image block's Focal point setting works the same way.
- Blocks placed before this was added follow the image when their own picker was left at the center. A block whose picker had been moved keeps its position.